Deploying Ghost to Synology NAS
Previously I described how to configure Synology NAS to use own domain name. In this post, I’m going to describe how to deploy Ghost in Synology NAS using Docker.
Ghost is a free and open-source blogging platform written in JavaScript and distributed under the MIT License, designed to simplify the process of online publishing for individual bloggers as well as online publications. Docker is a computer program that performs operating-system-level virtualization, also known as “containerization”. It was first released in 2013 and is developed by Docker, Inc. Docker is used to running software packages called “containers”.
All the steps below are performed on Synology DS218+
First of all, we need to install the Docker package on the NAS. It doesn’t require a special configuration, just go to the Package Center, search Docker, and install it. That is it.
 Docker Package
Then I’d strongly recommend installing MariaDB10 package. Of course, Ghost could use SQLiteas the DB, but I’m going to use MariaDB.
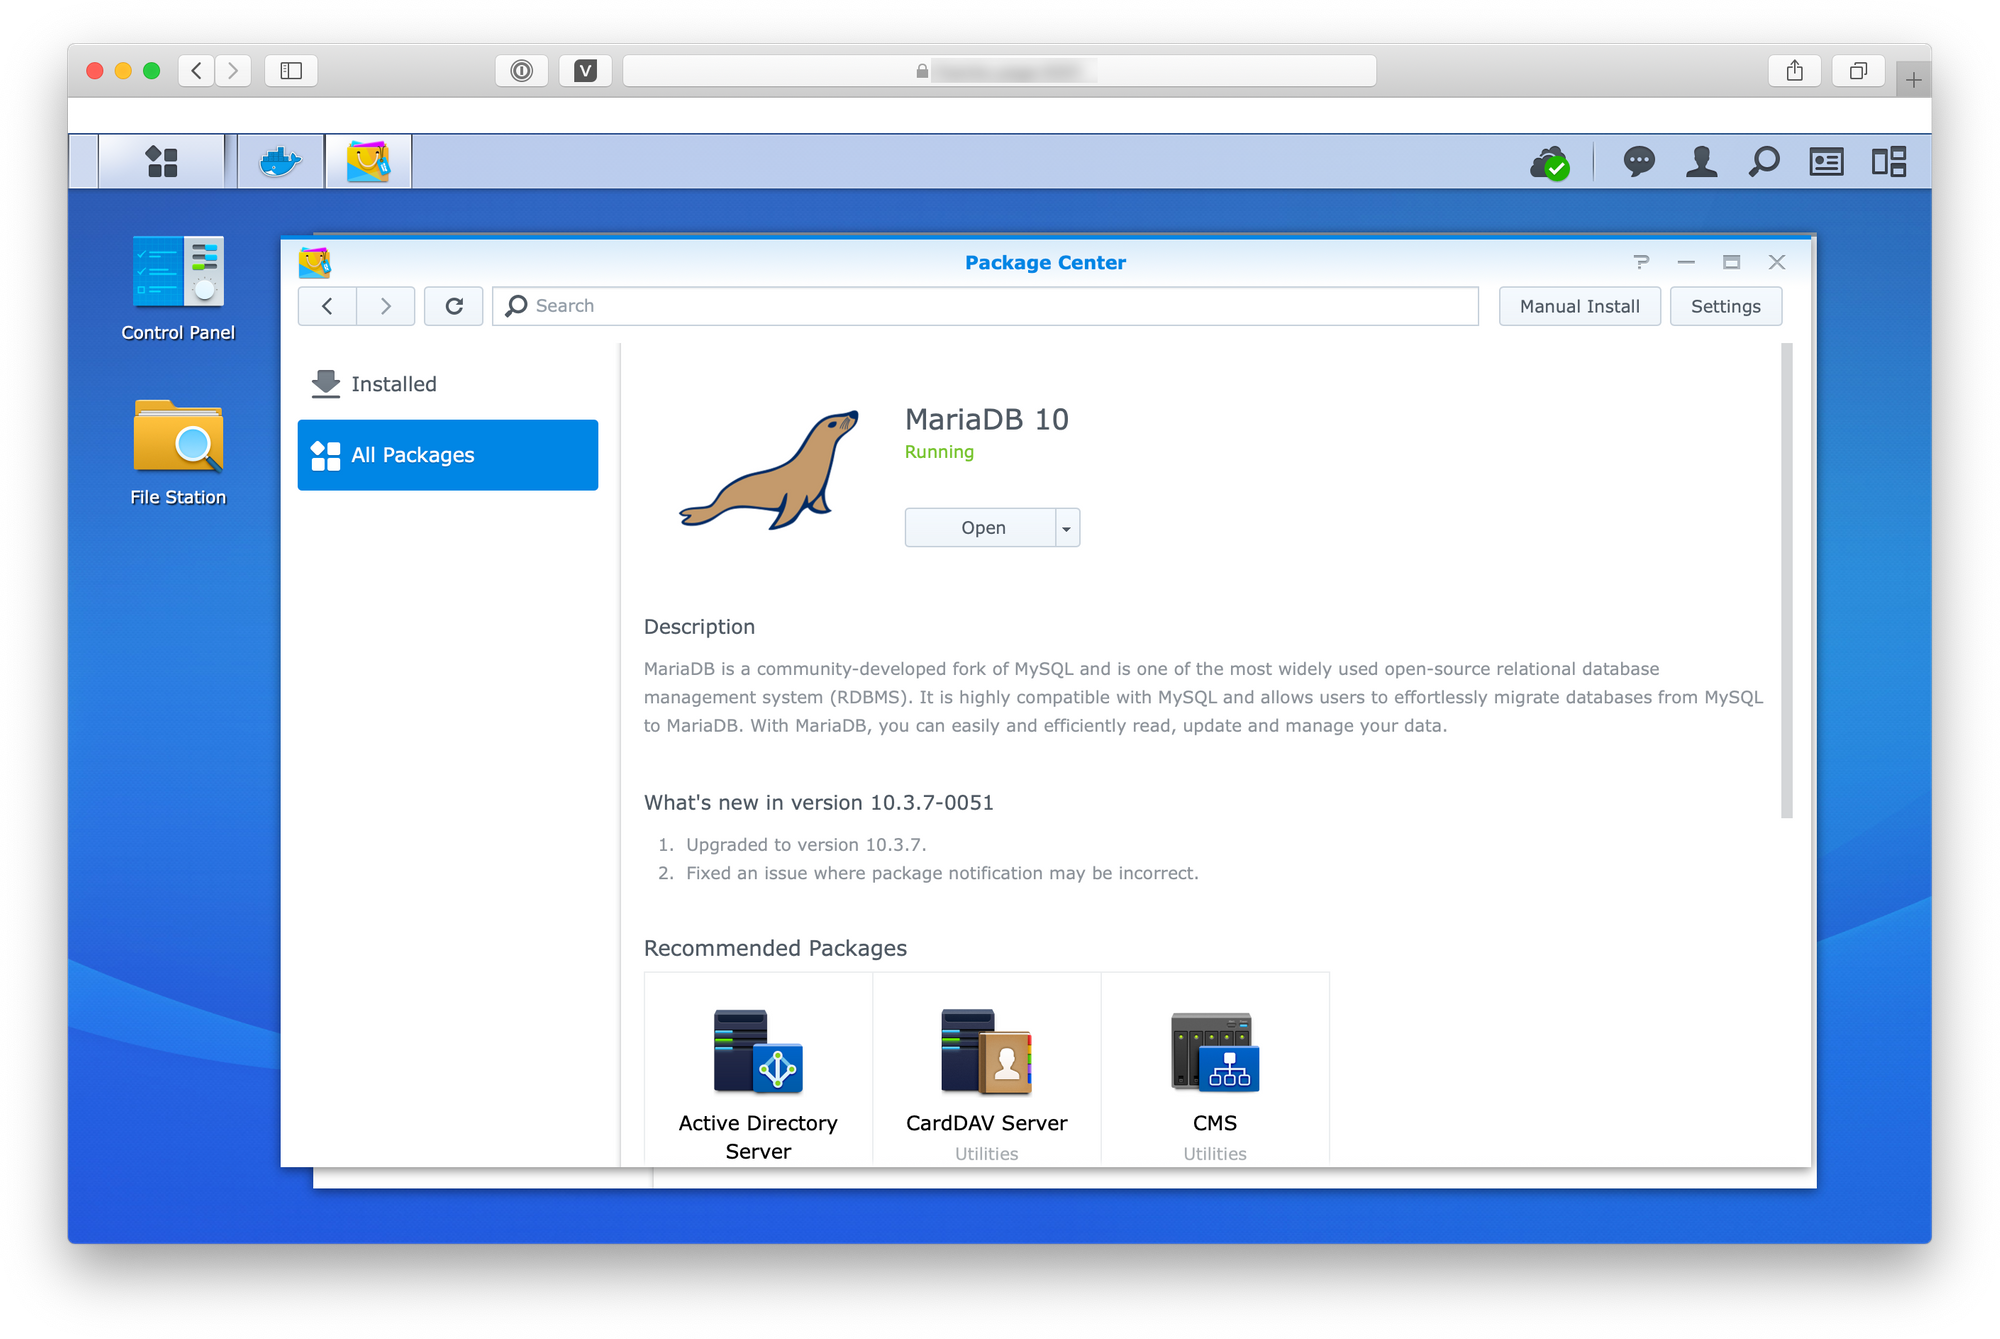 MariaDB 10 Package
There is a phpMyAdminpackage which helps manage installed MariaDB databases, users, and other stuff related to the database. So, I’d recommend installing that package as well.
I’ve created a new blog database in phpMyAdmin as well as a separate user for the database.
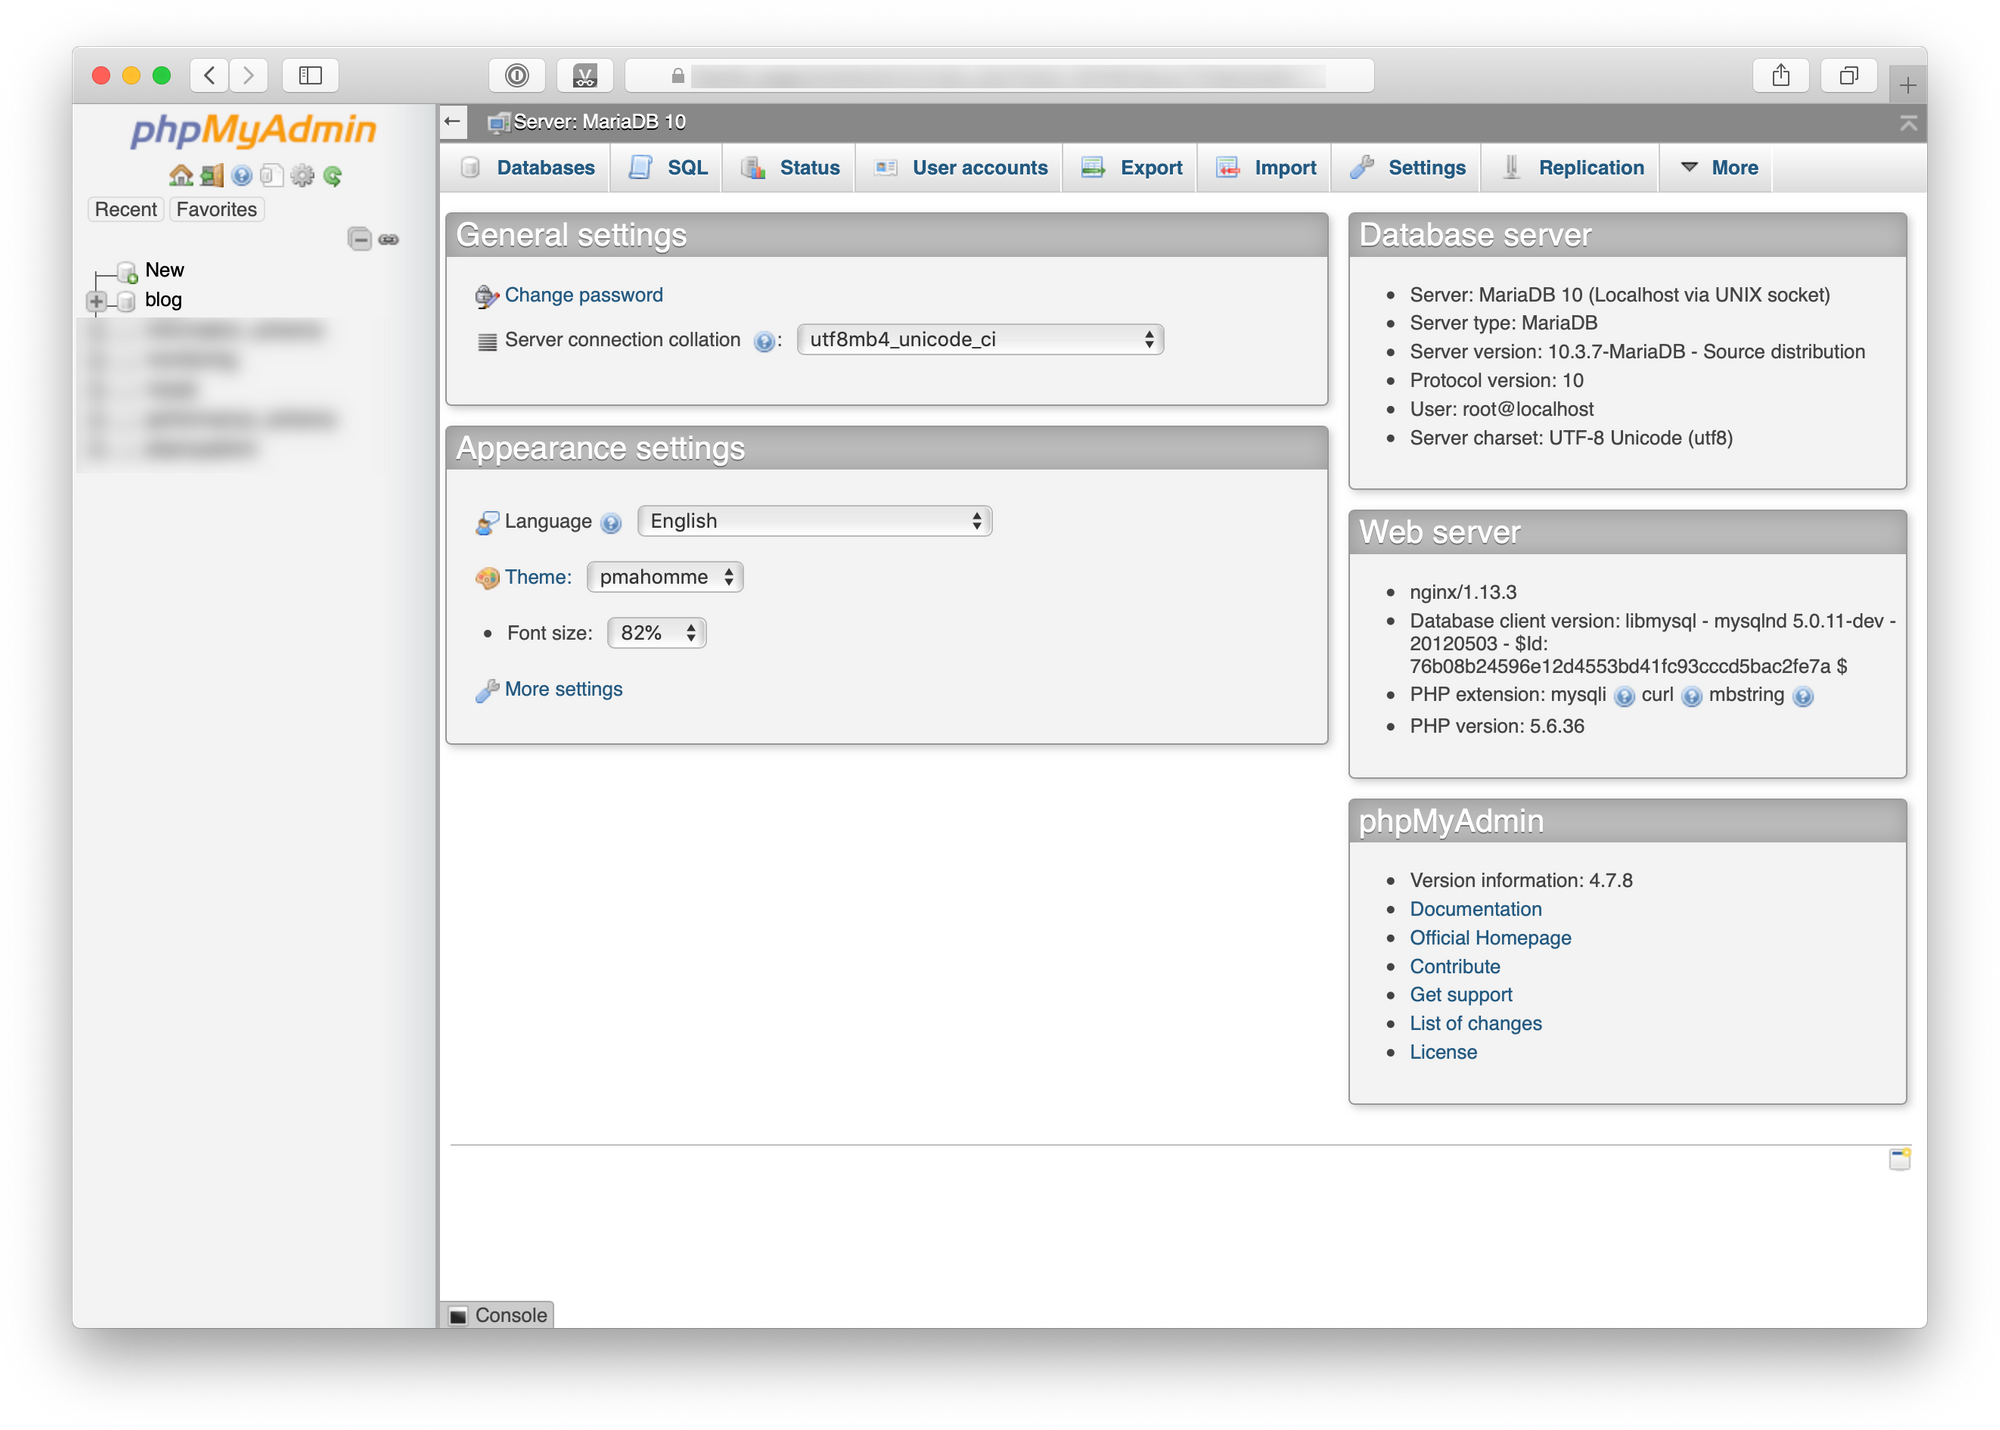 phpMyAdmin
After that, we are good to go to deploy Ghost in the Docker.
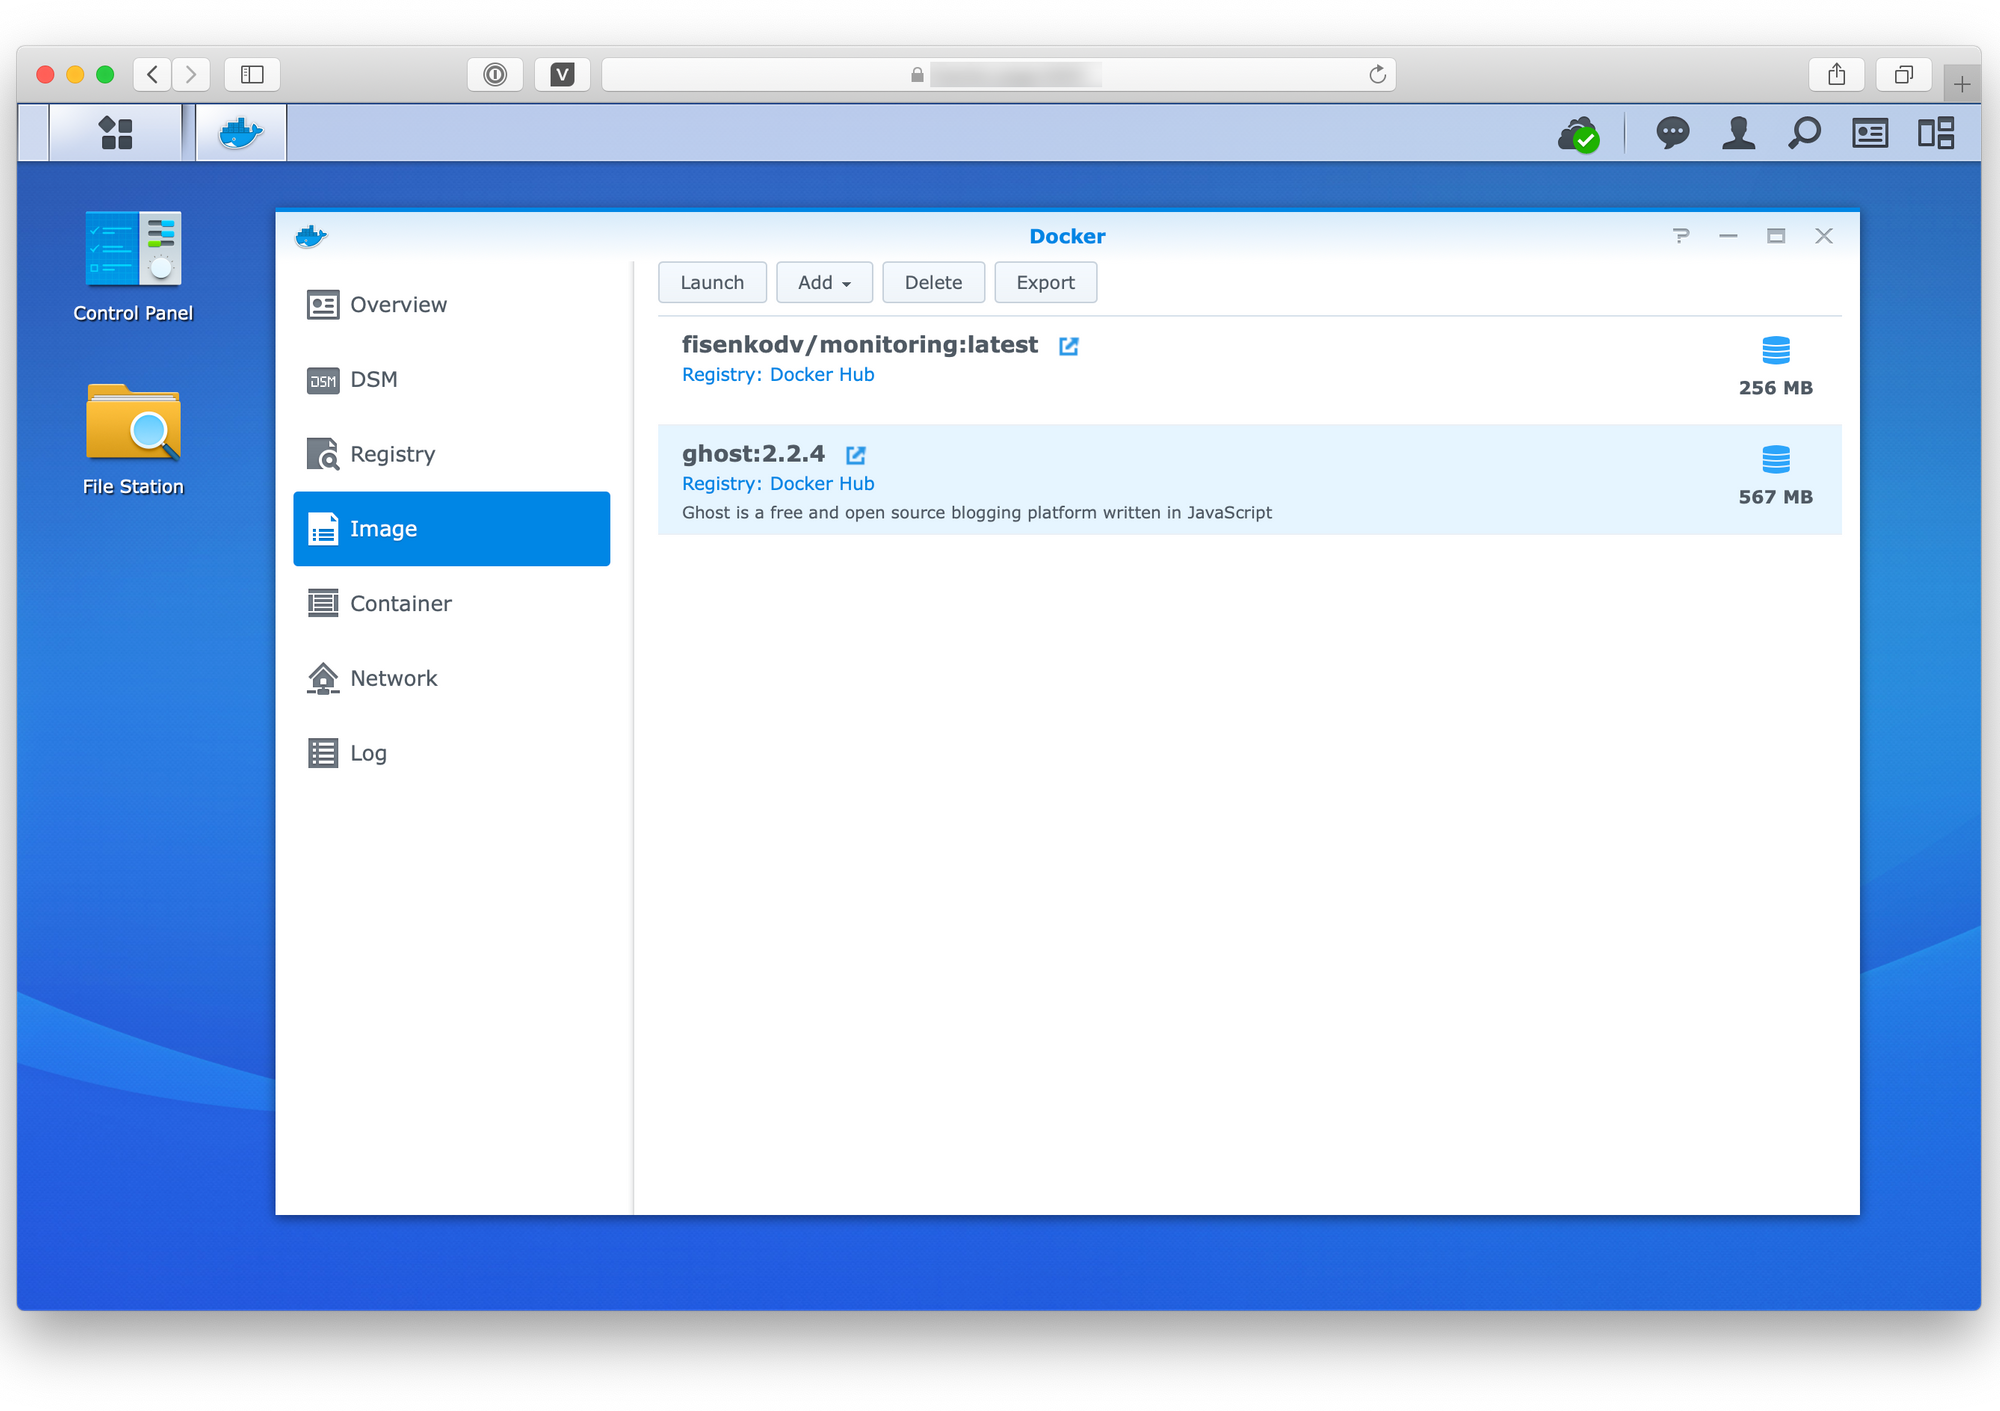
In the Docker package in the Registry, search and download ghost image
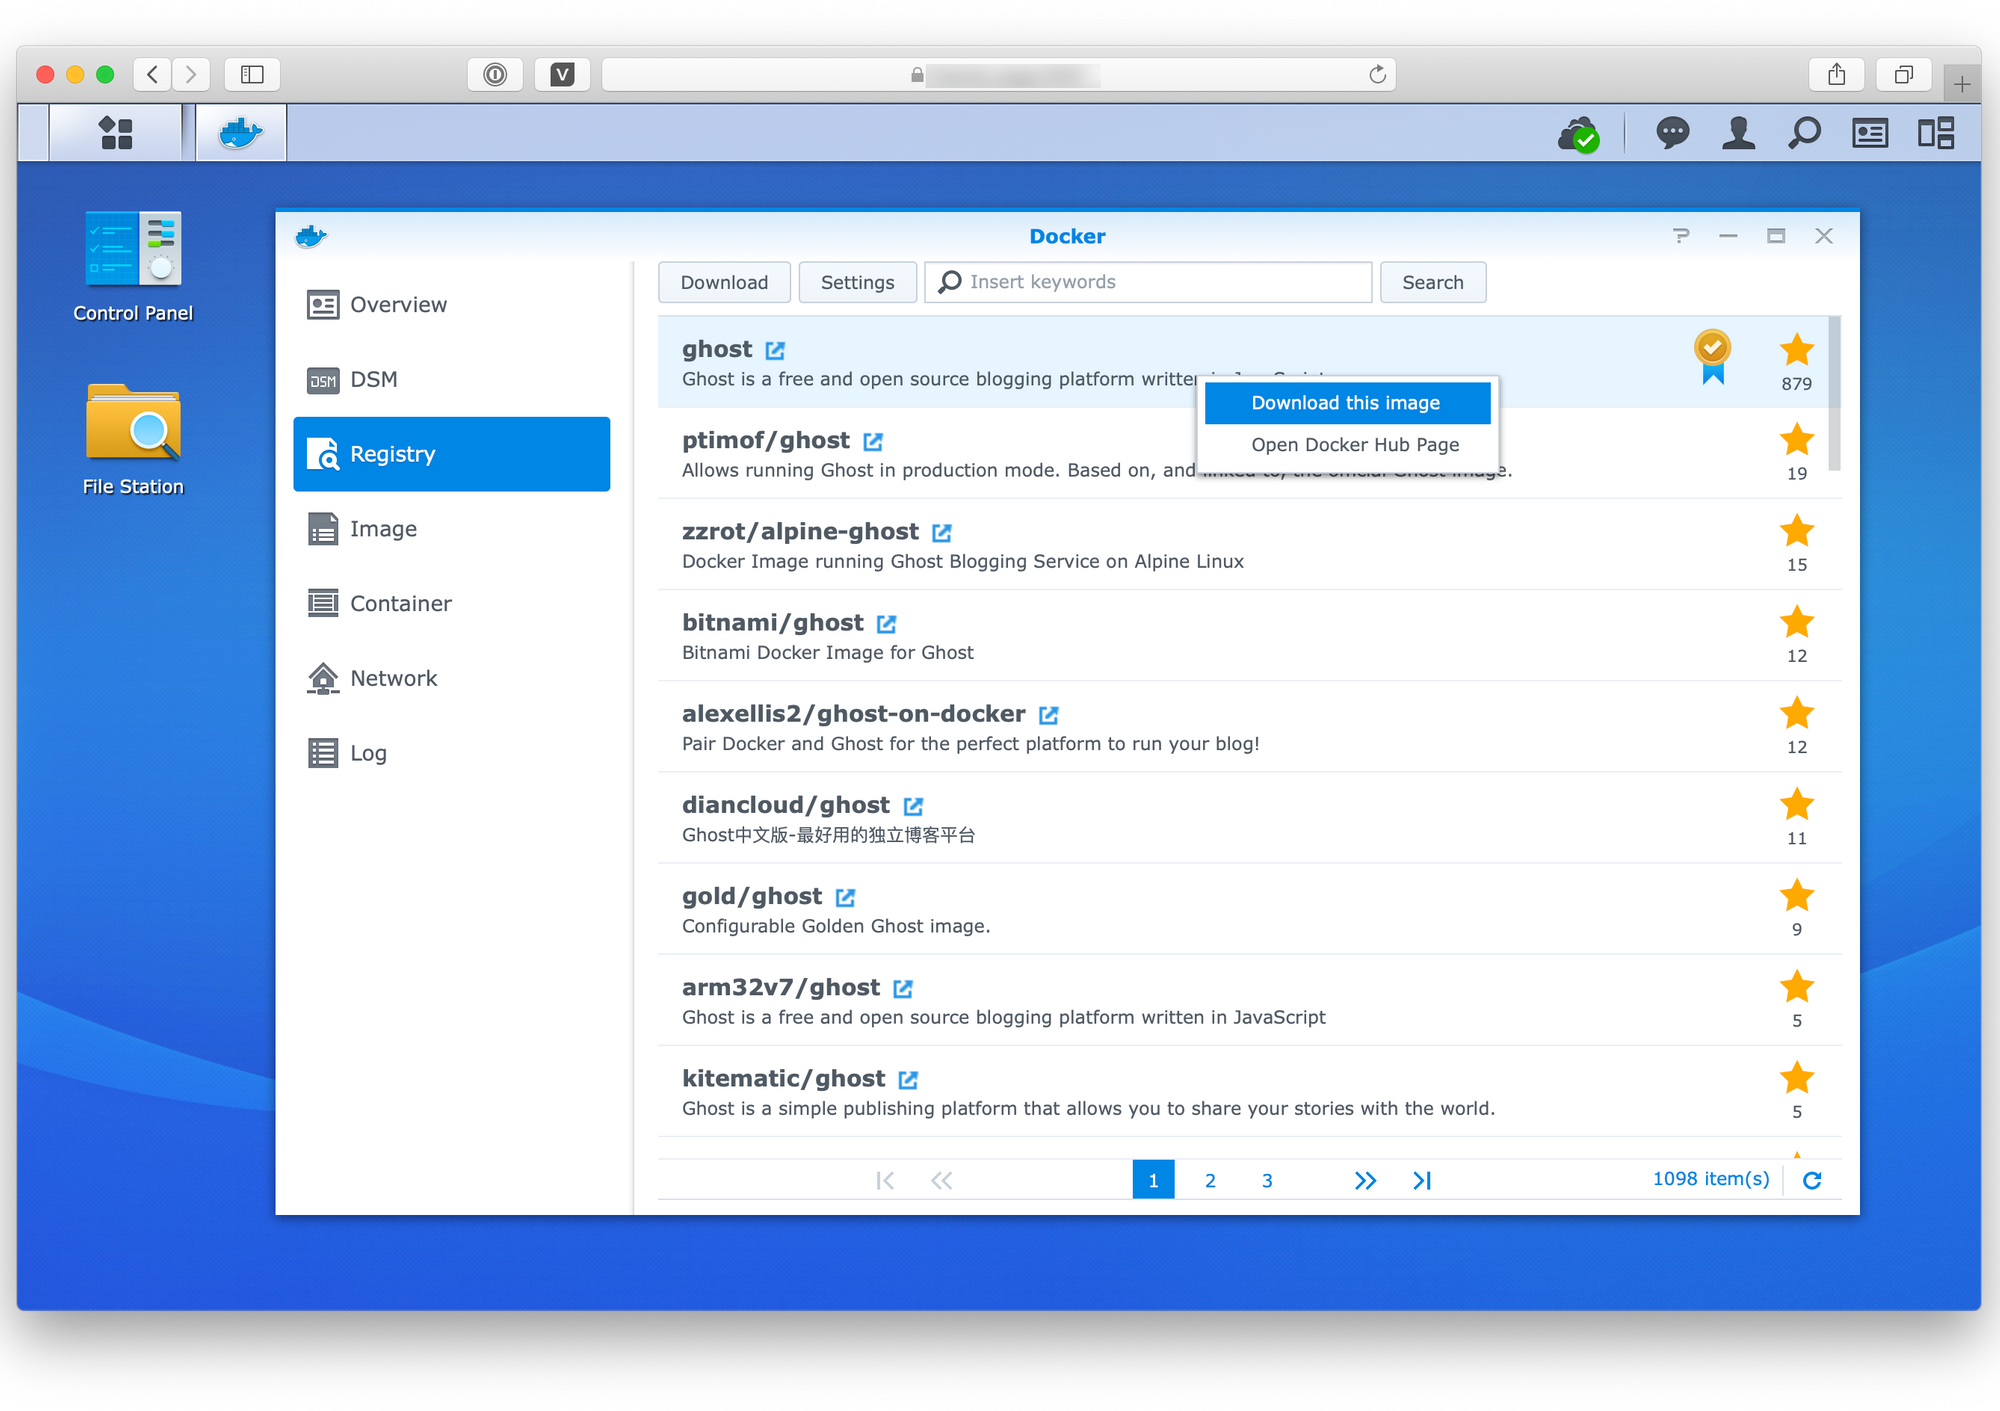
after that, the image will be available in the Images, where the ghost image should be selected and launched, as on the screenshot below
phpMyAdmin
 Launch Ghost image
Below I’ll provide the settings for the container I used
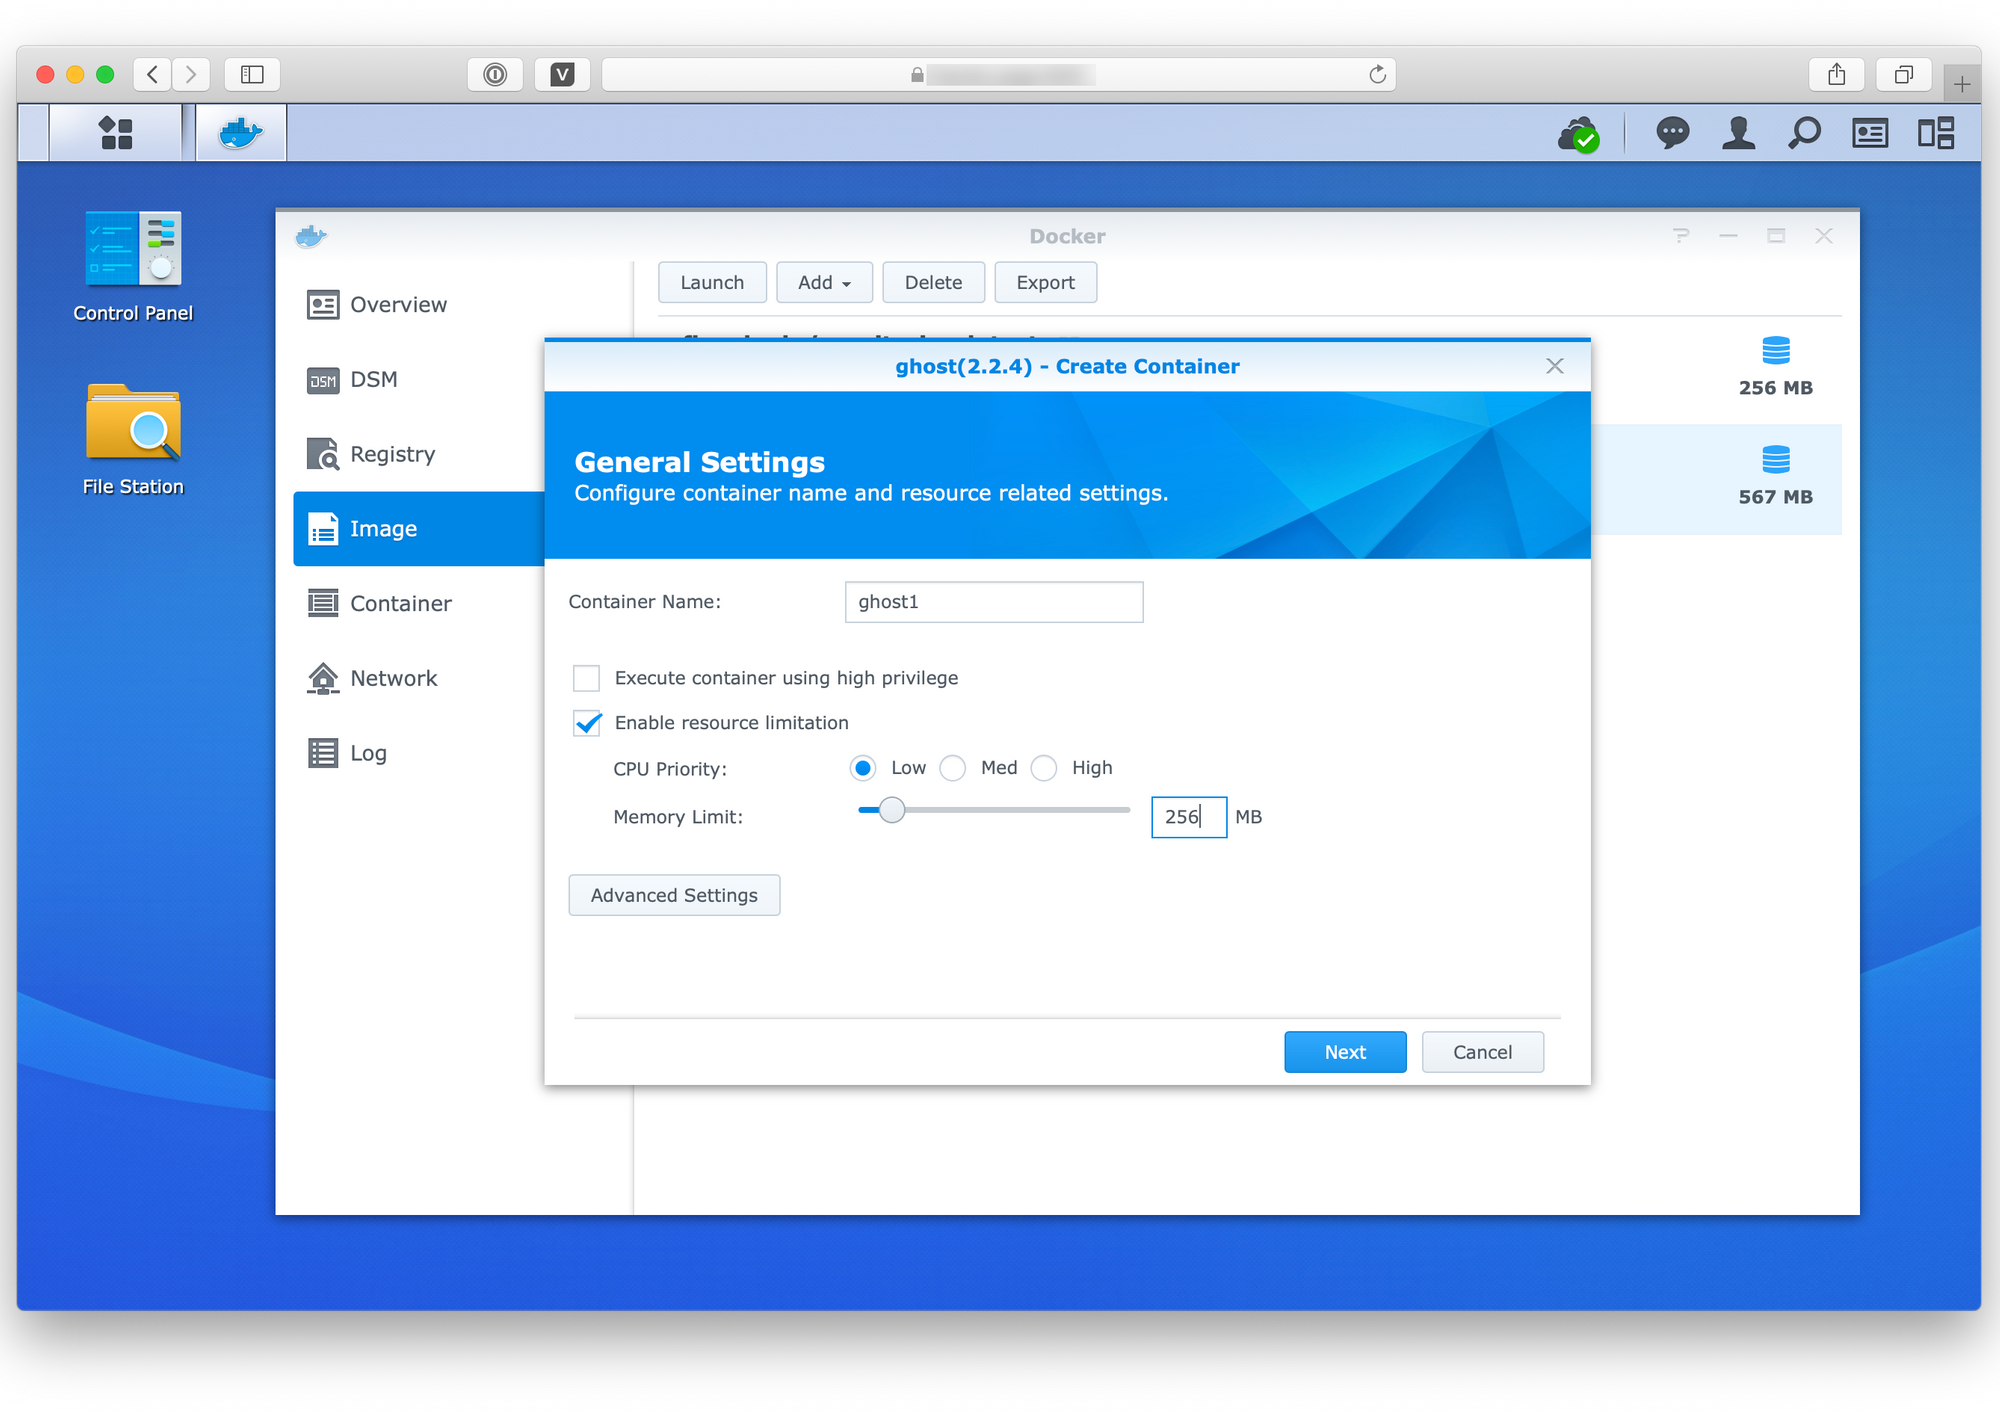 General Settings
I use Low CPU Priority setting along with 256Mb Memory Limit
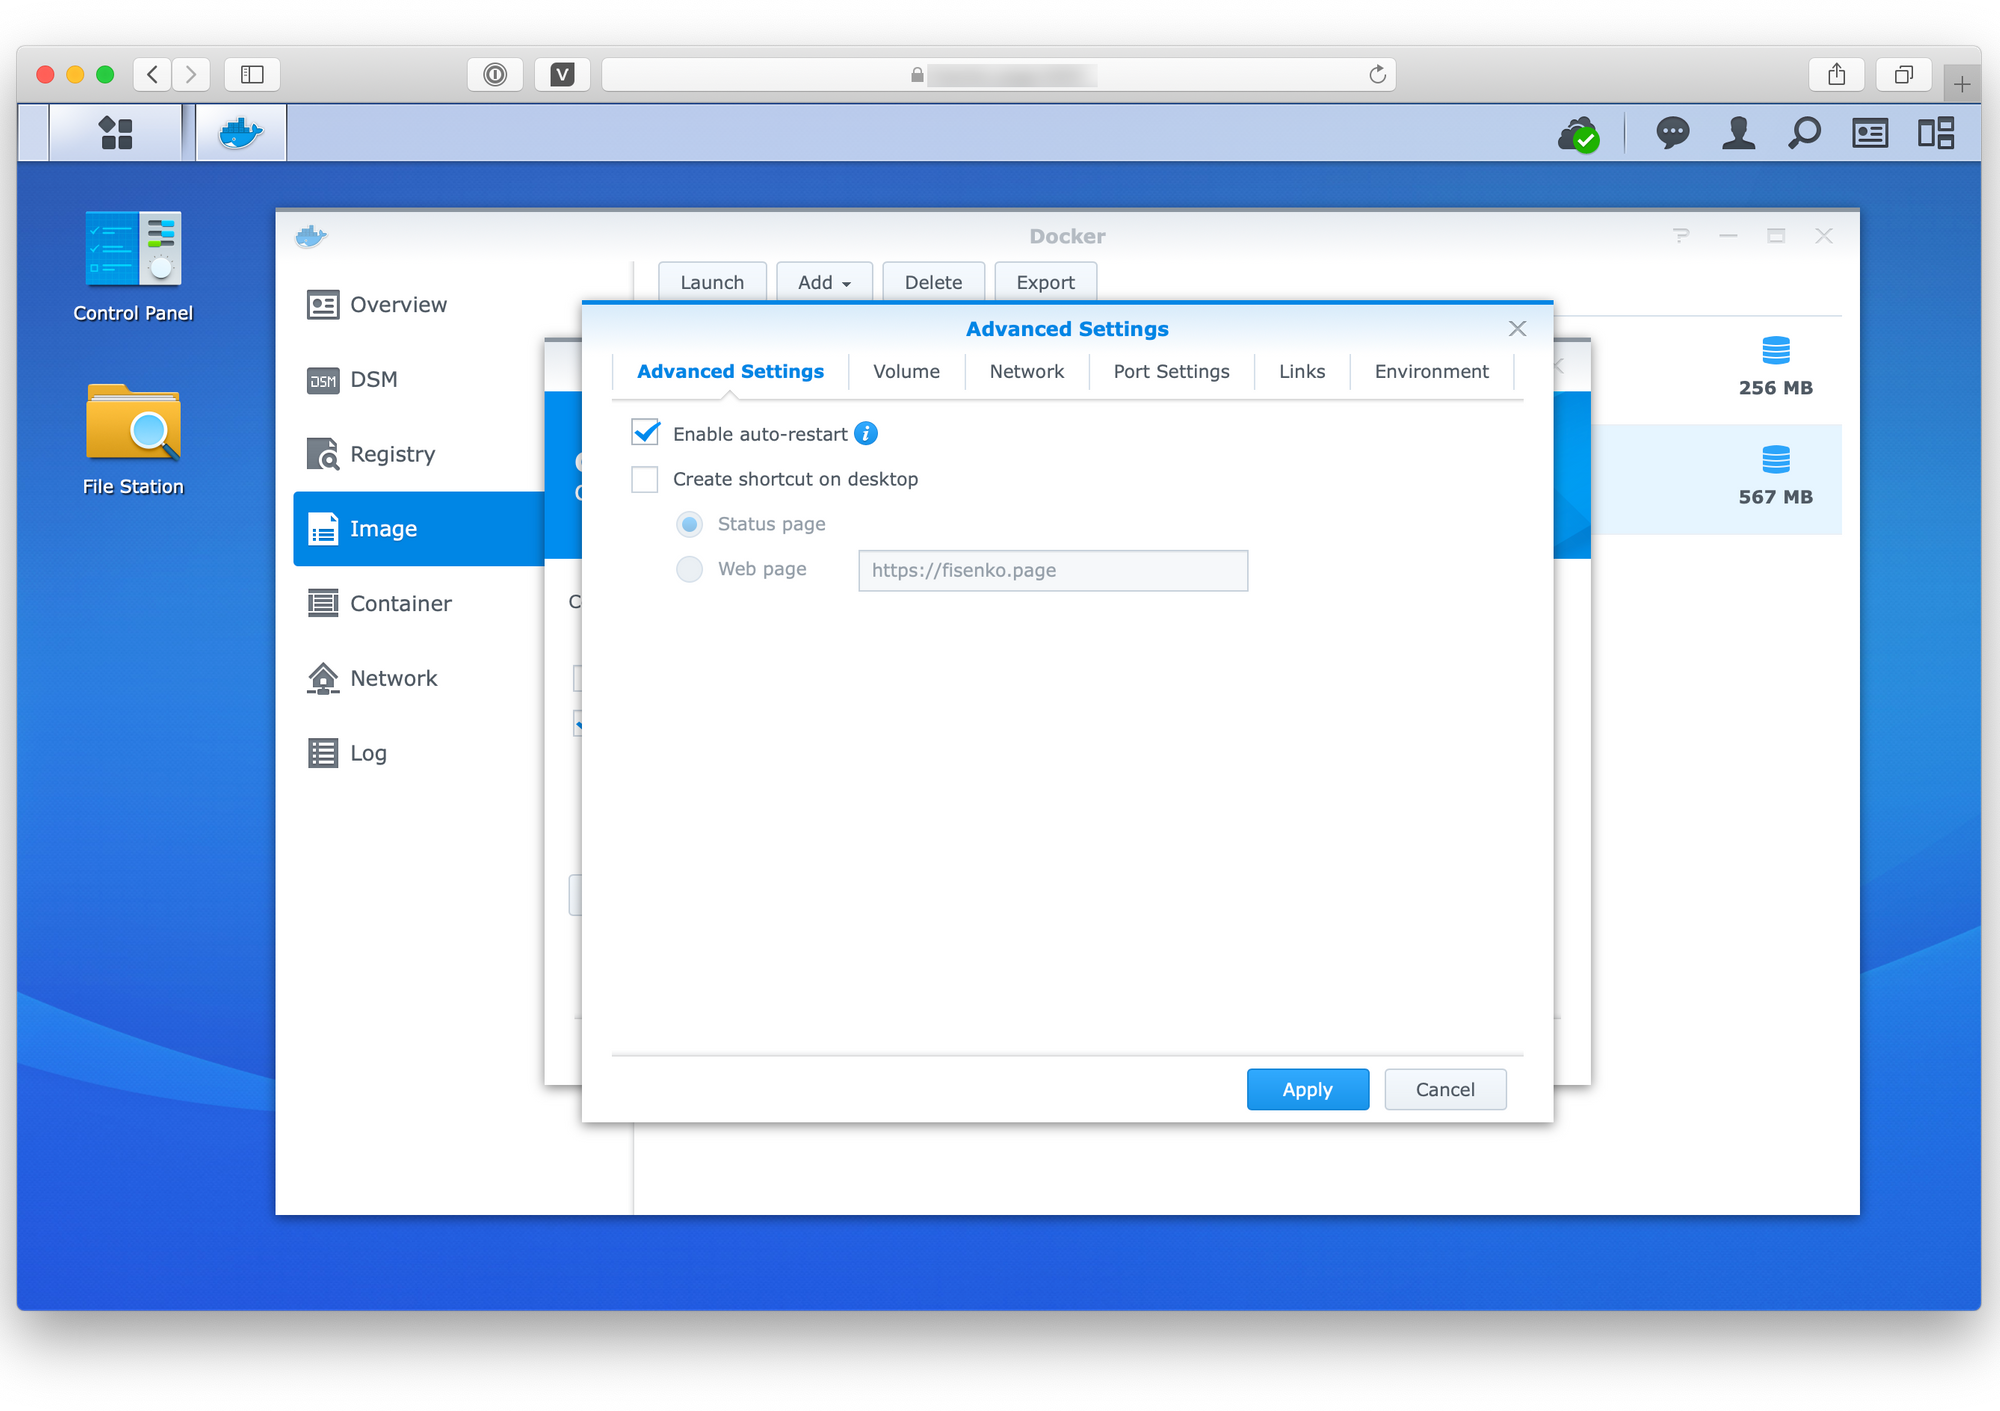 Advanced Settings
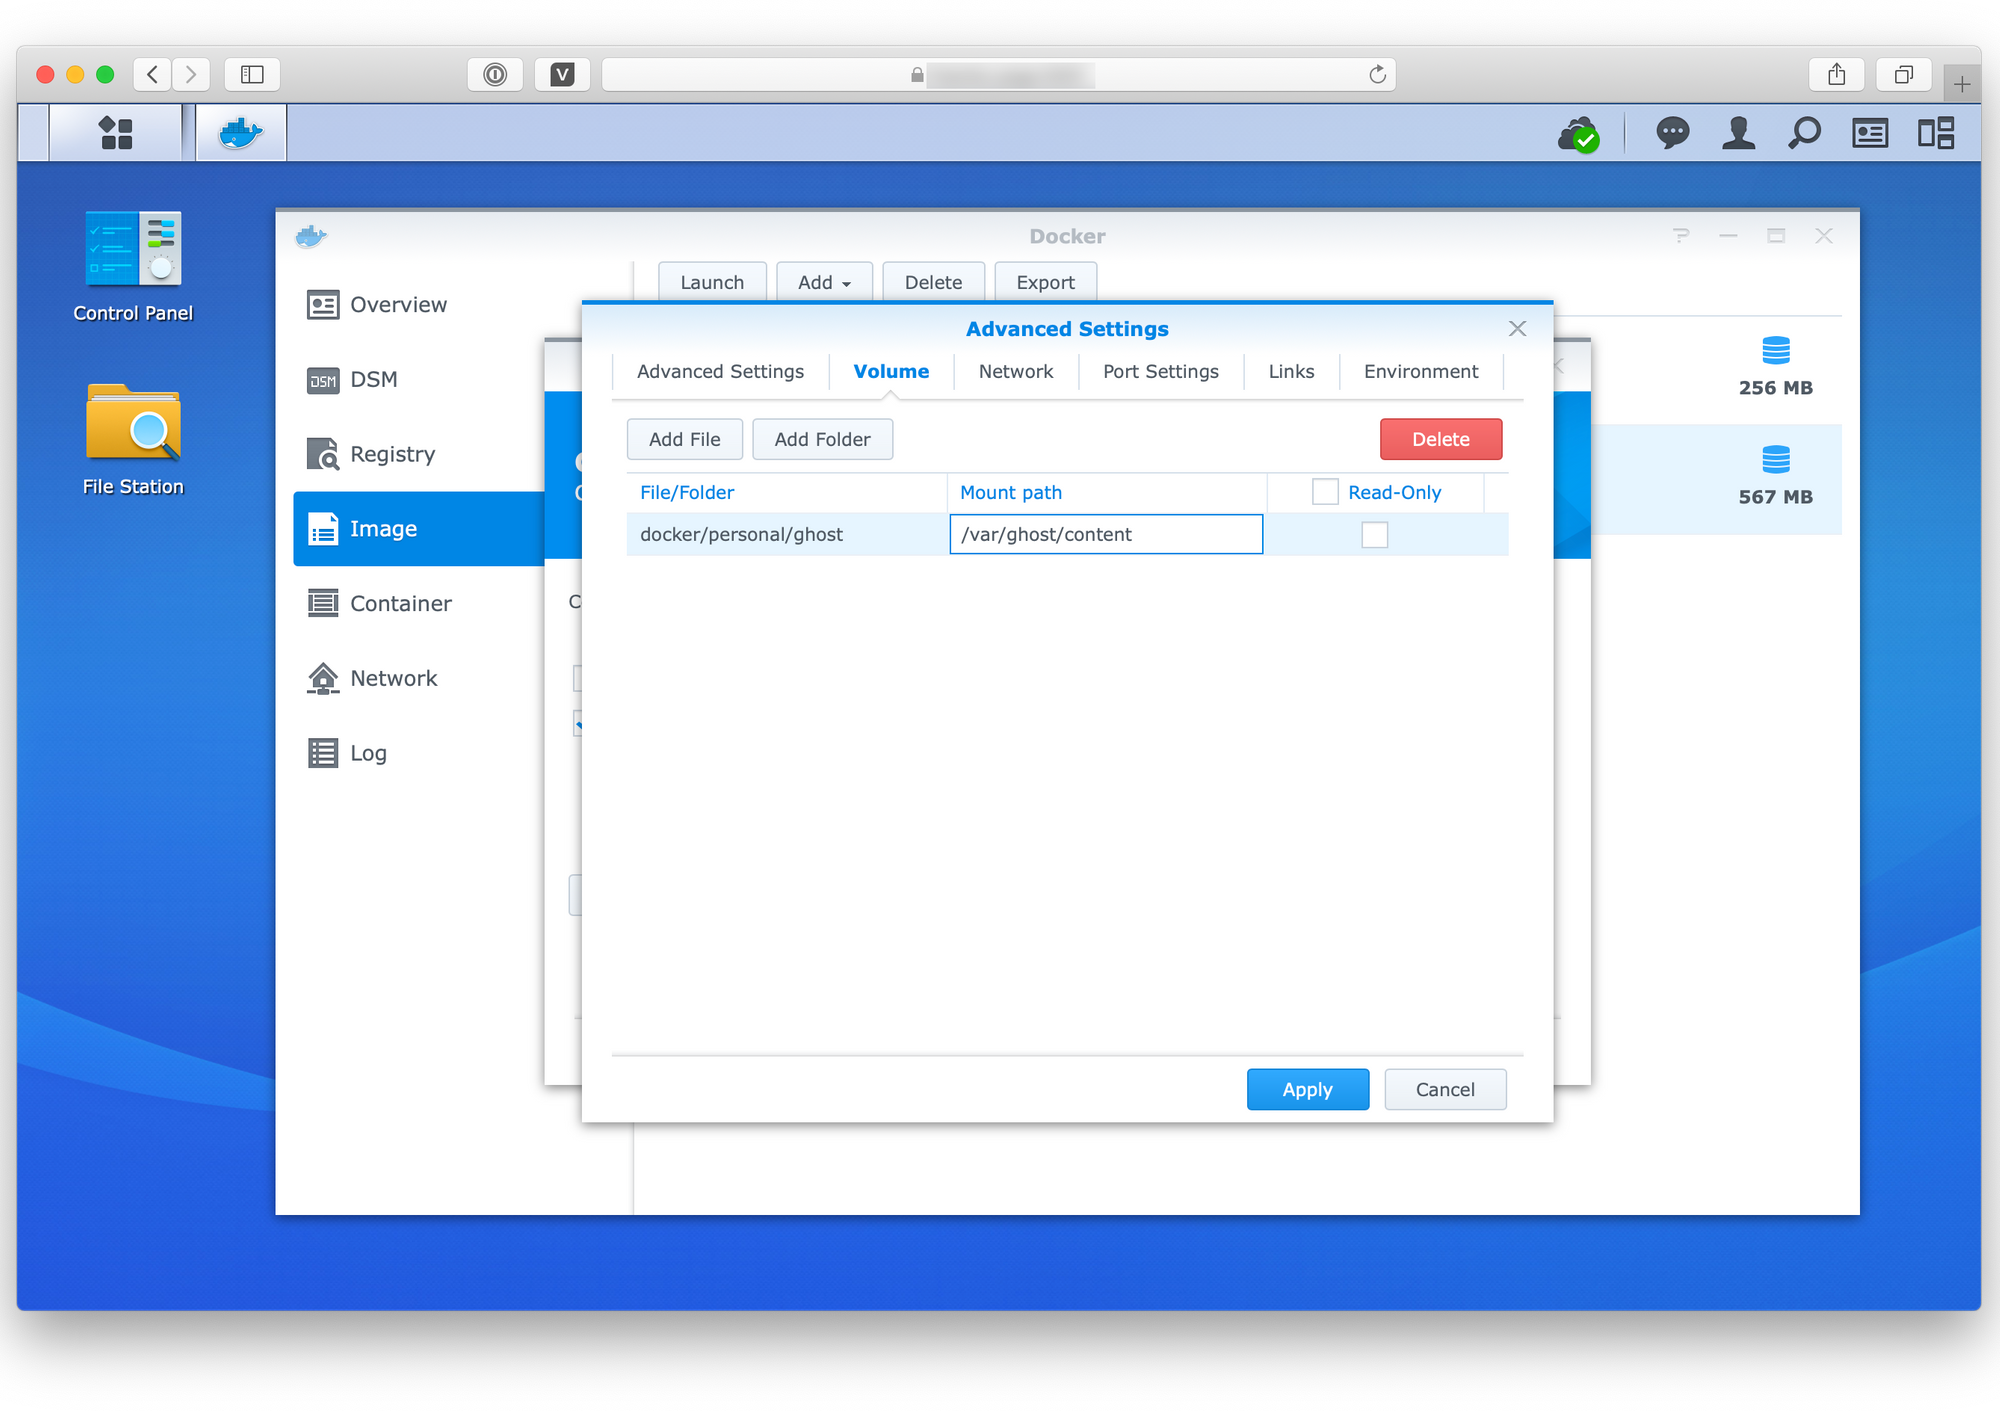 Volume Settings
Prior the Volume configuration docker/personal/ghost should be created on the storage, it will allow the docker container write data to the storage through /var/ghost/content directory, i.e. save changes like a theme, images when the container is restarted.
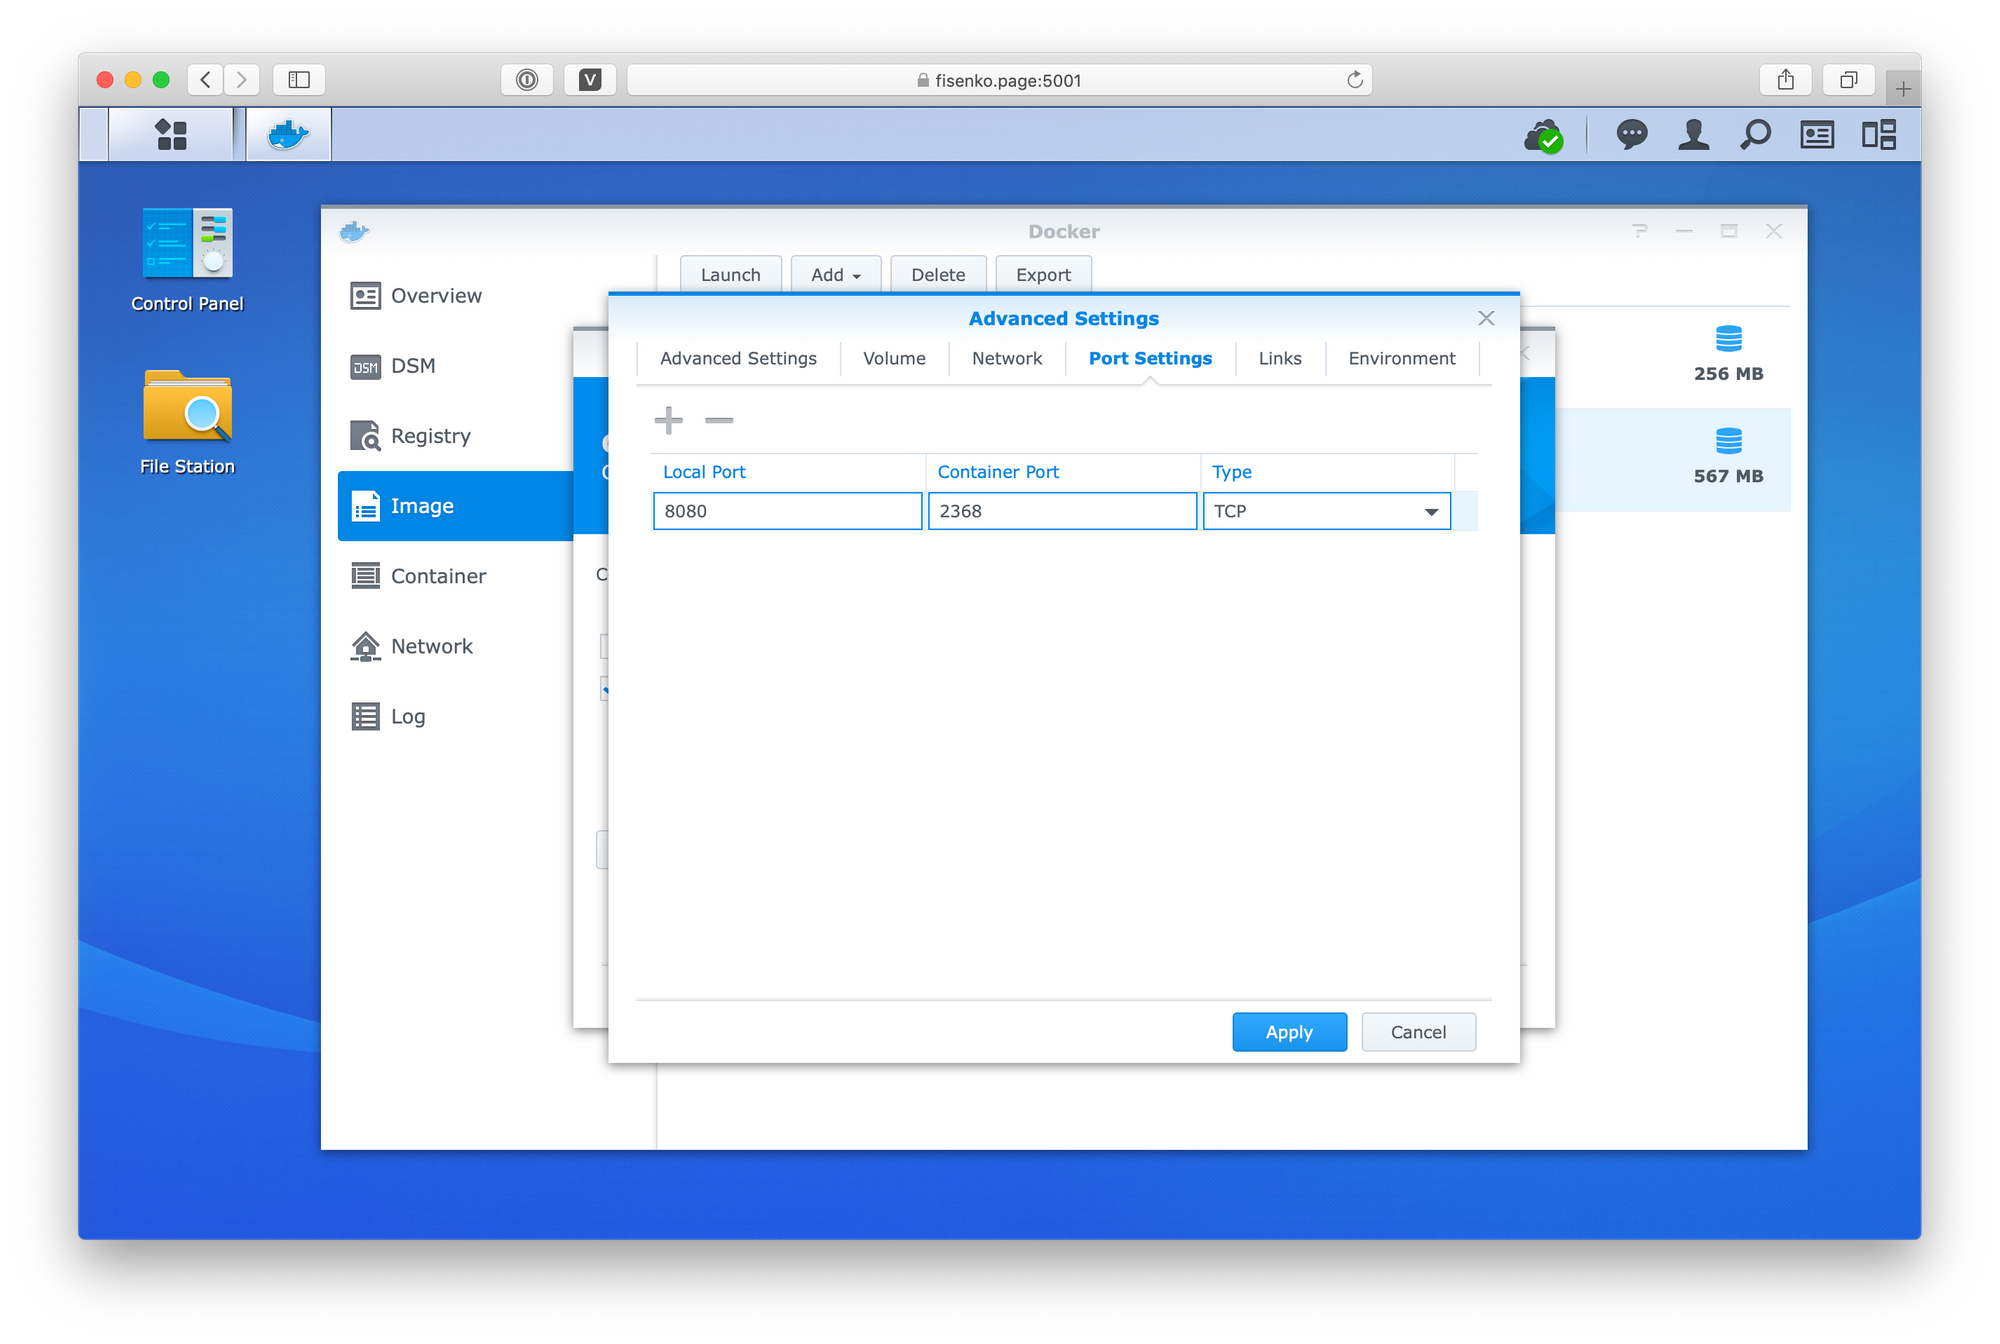 Port Setting
Any unused NAS local port could be used for the Port Settings. The most important part is Environment, see the values I used to make it works.
 Environment Settings
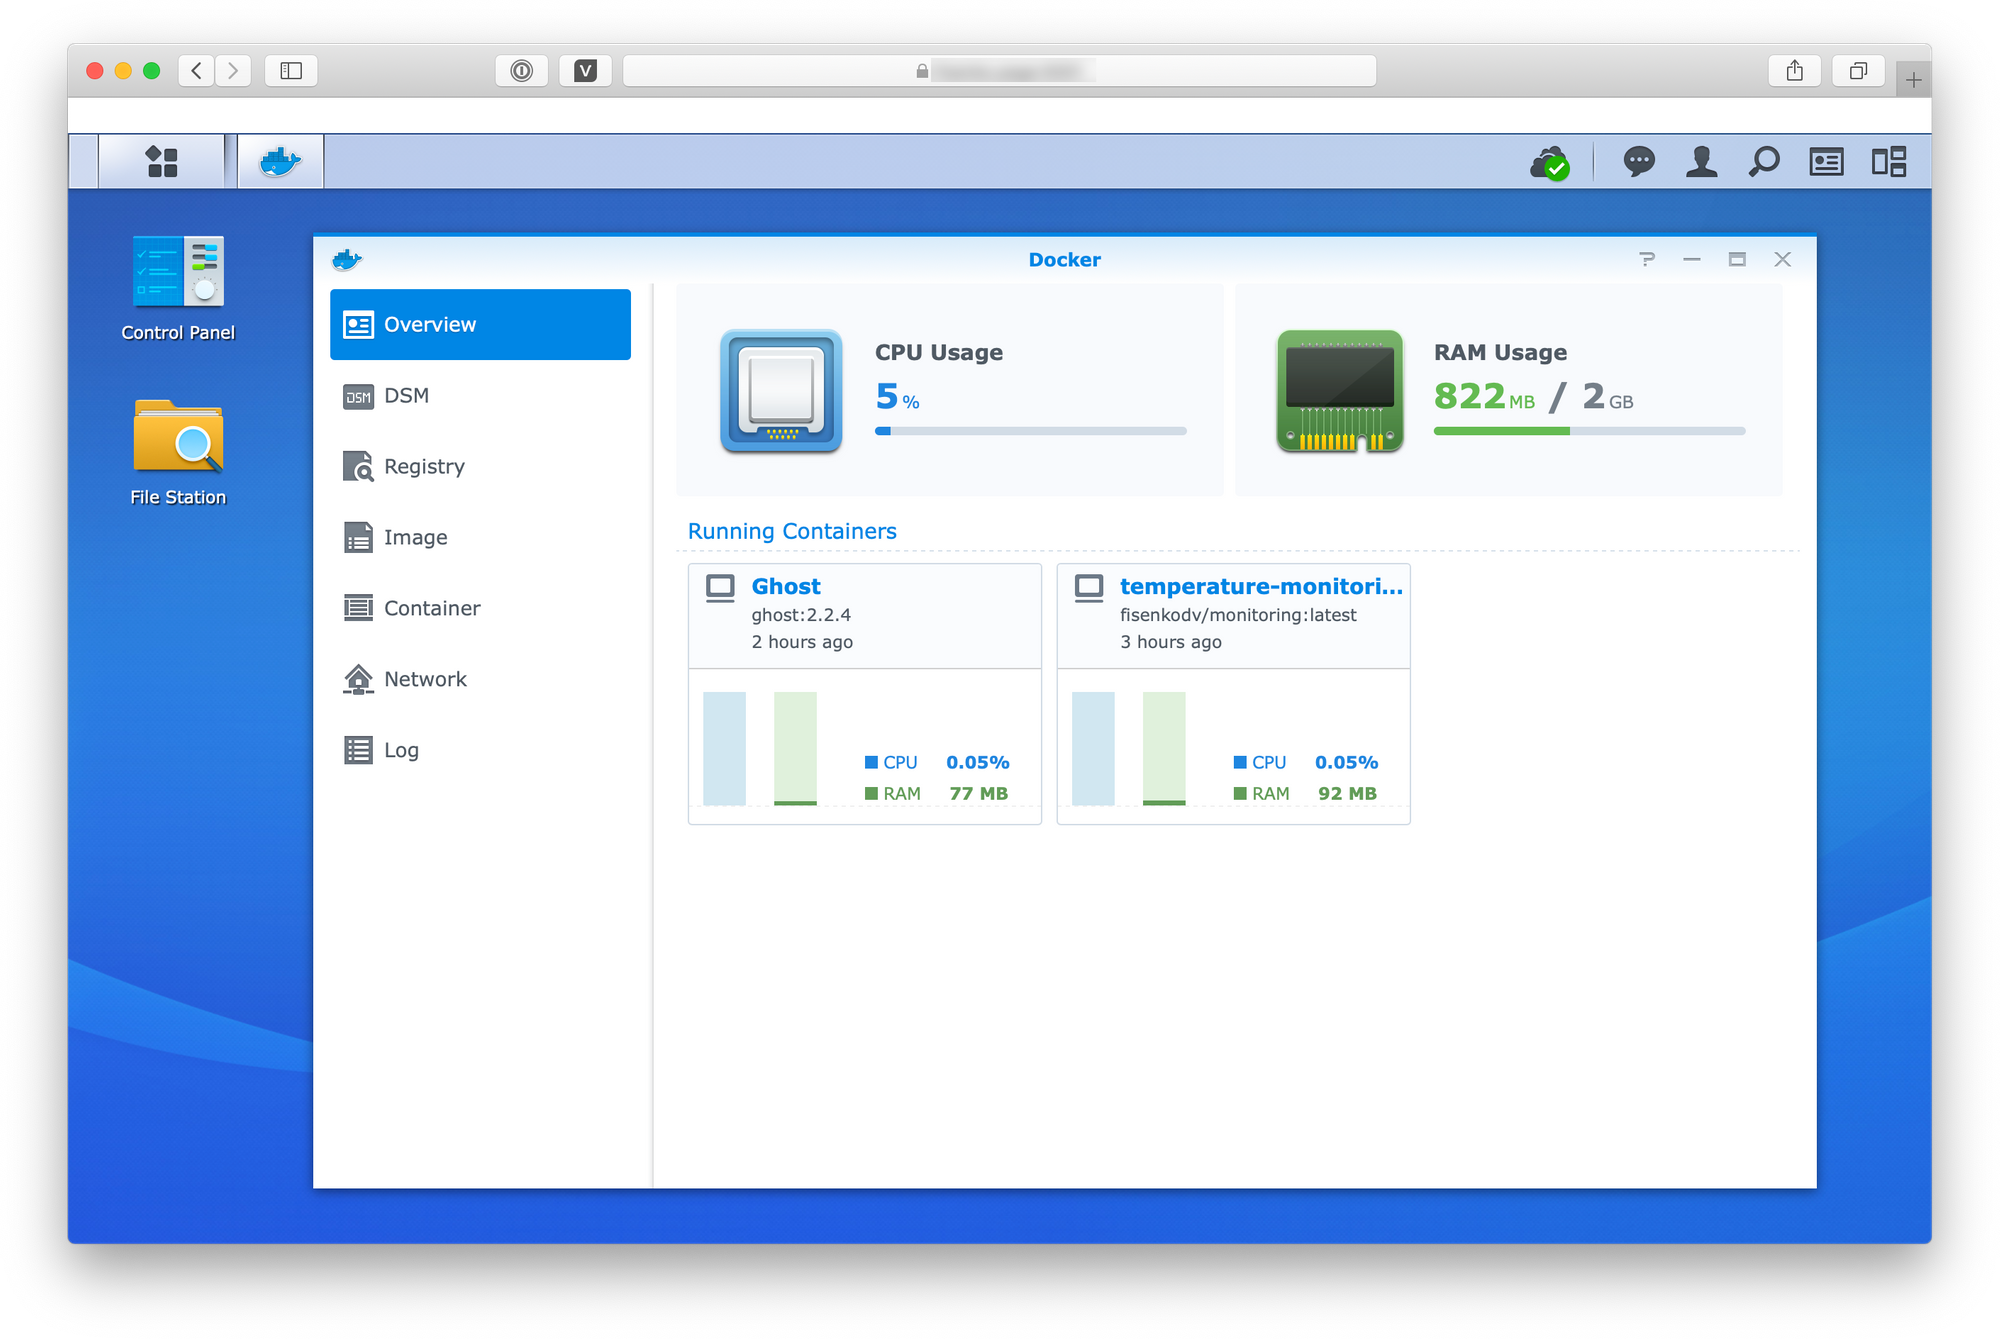
After applying these steps Ghost container should be up and running.
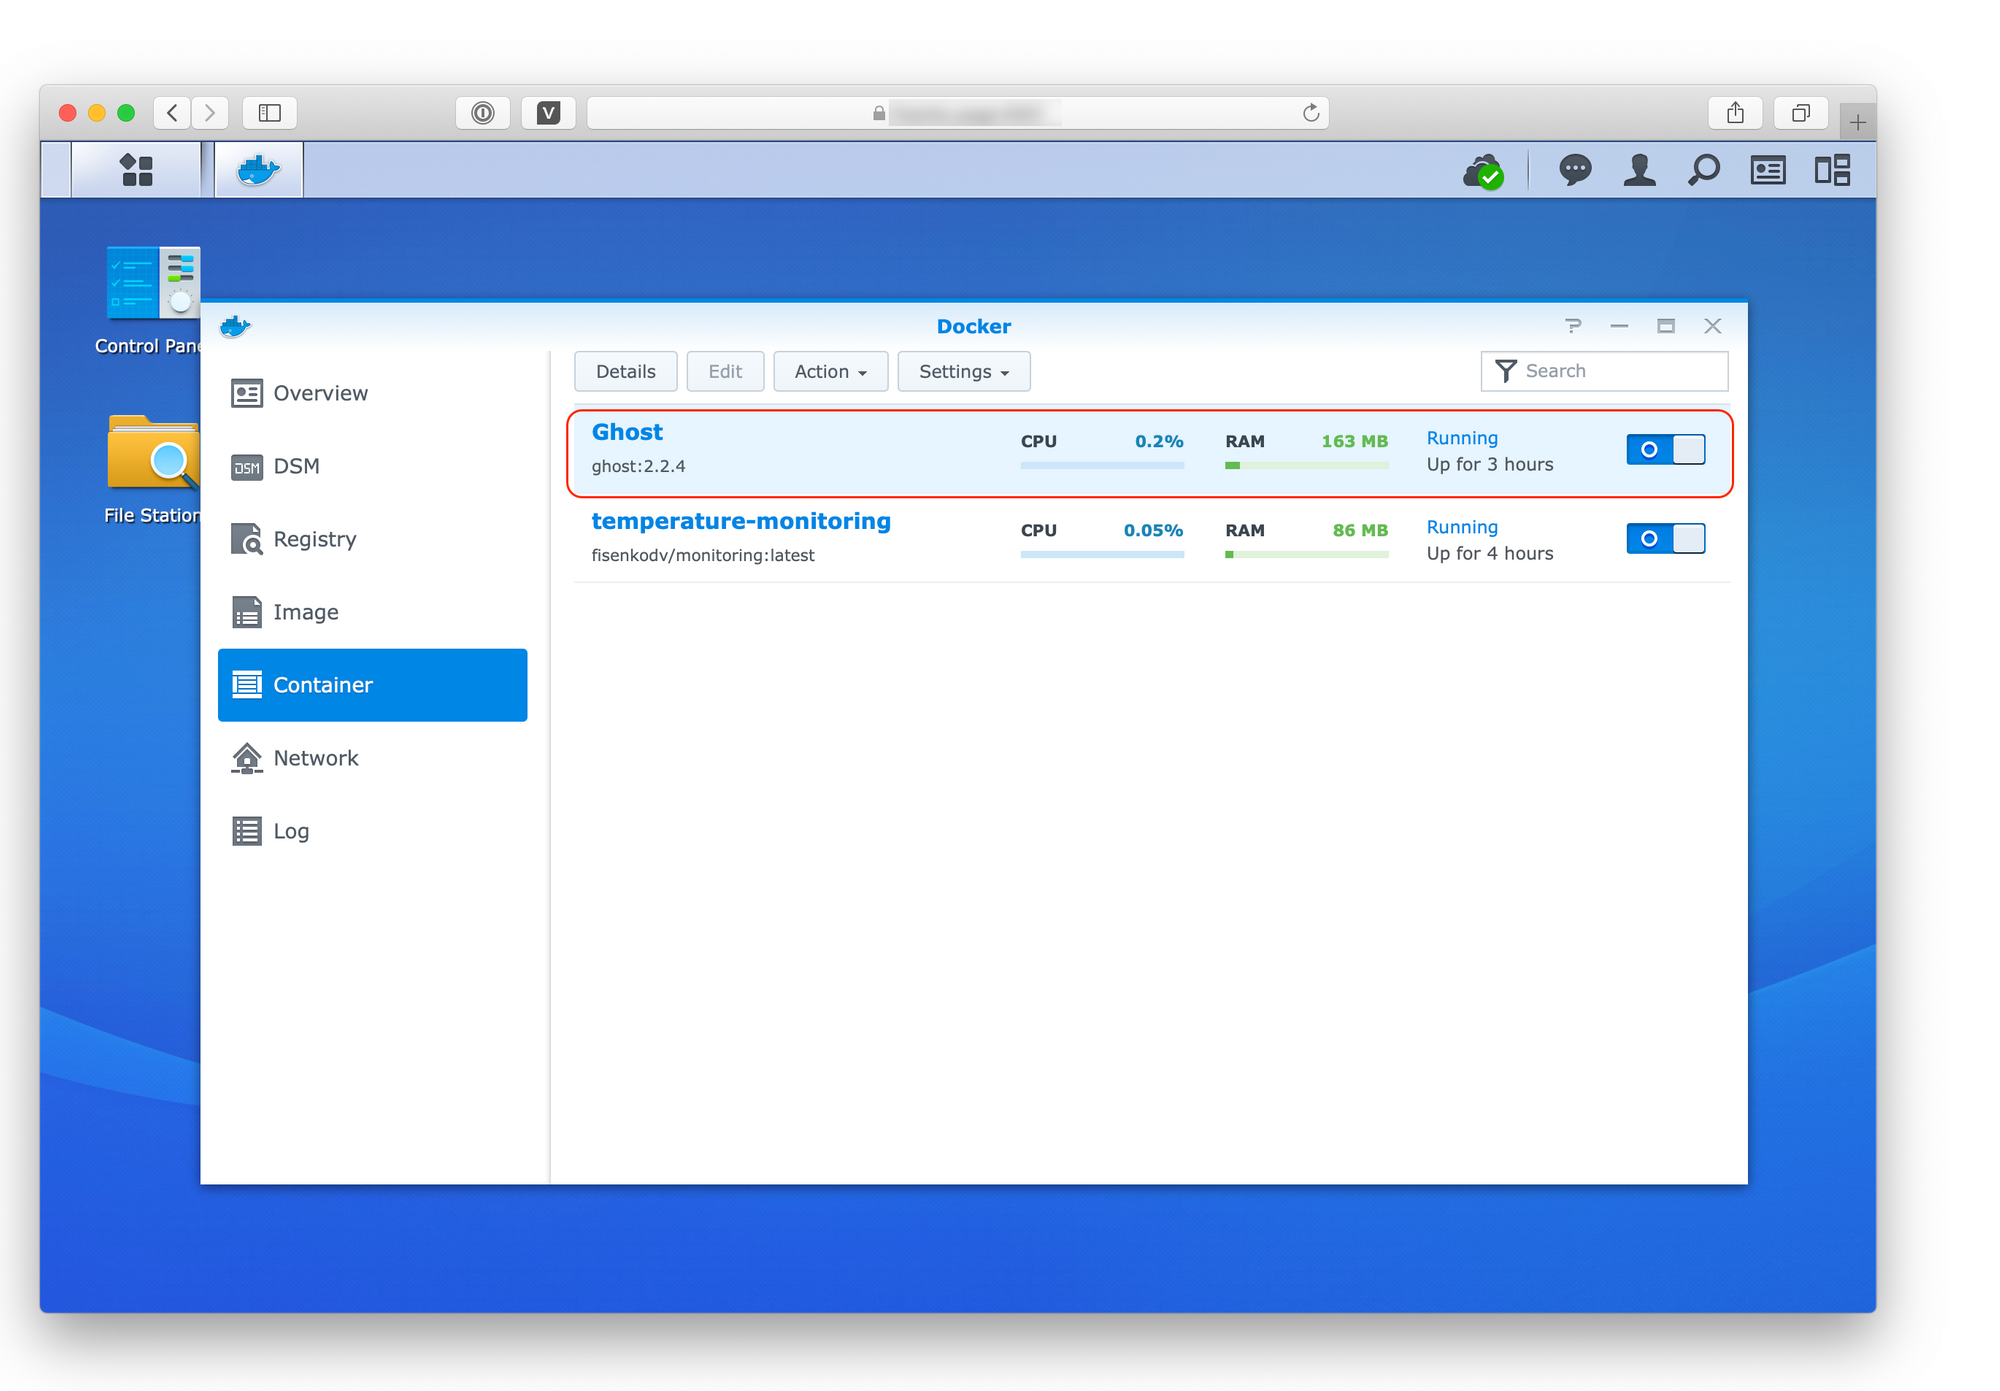 Running Docker
And available locally e.g. by local IP address http://192.168.1.2:8080. To make the blog available outside and have a domain name like https://blog.fisenko.net (also see Configuring Synology NAS to use own domain name go to the Control Panel, Application Portal, Reverse Proxy and create a configuration for HTTP and HTTPS protocols:
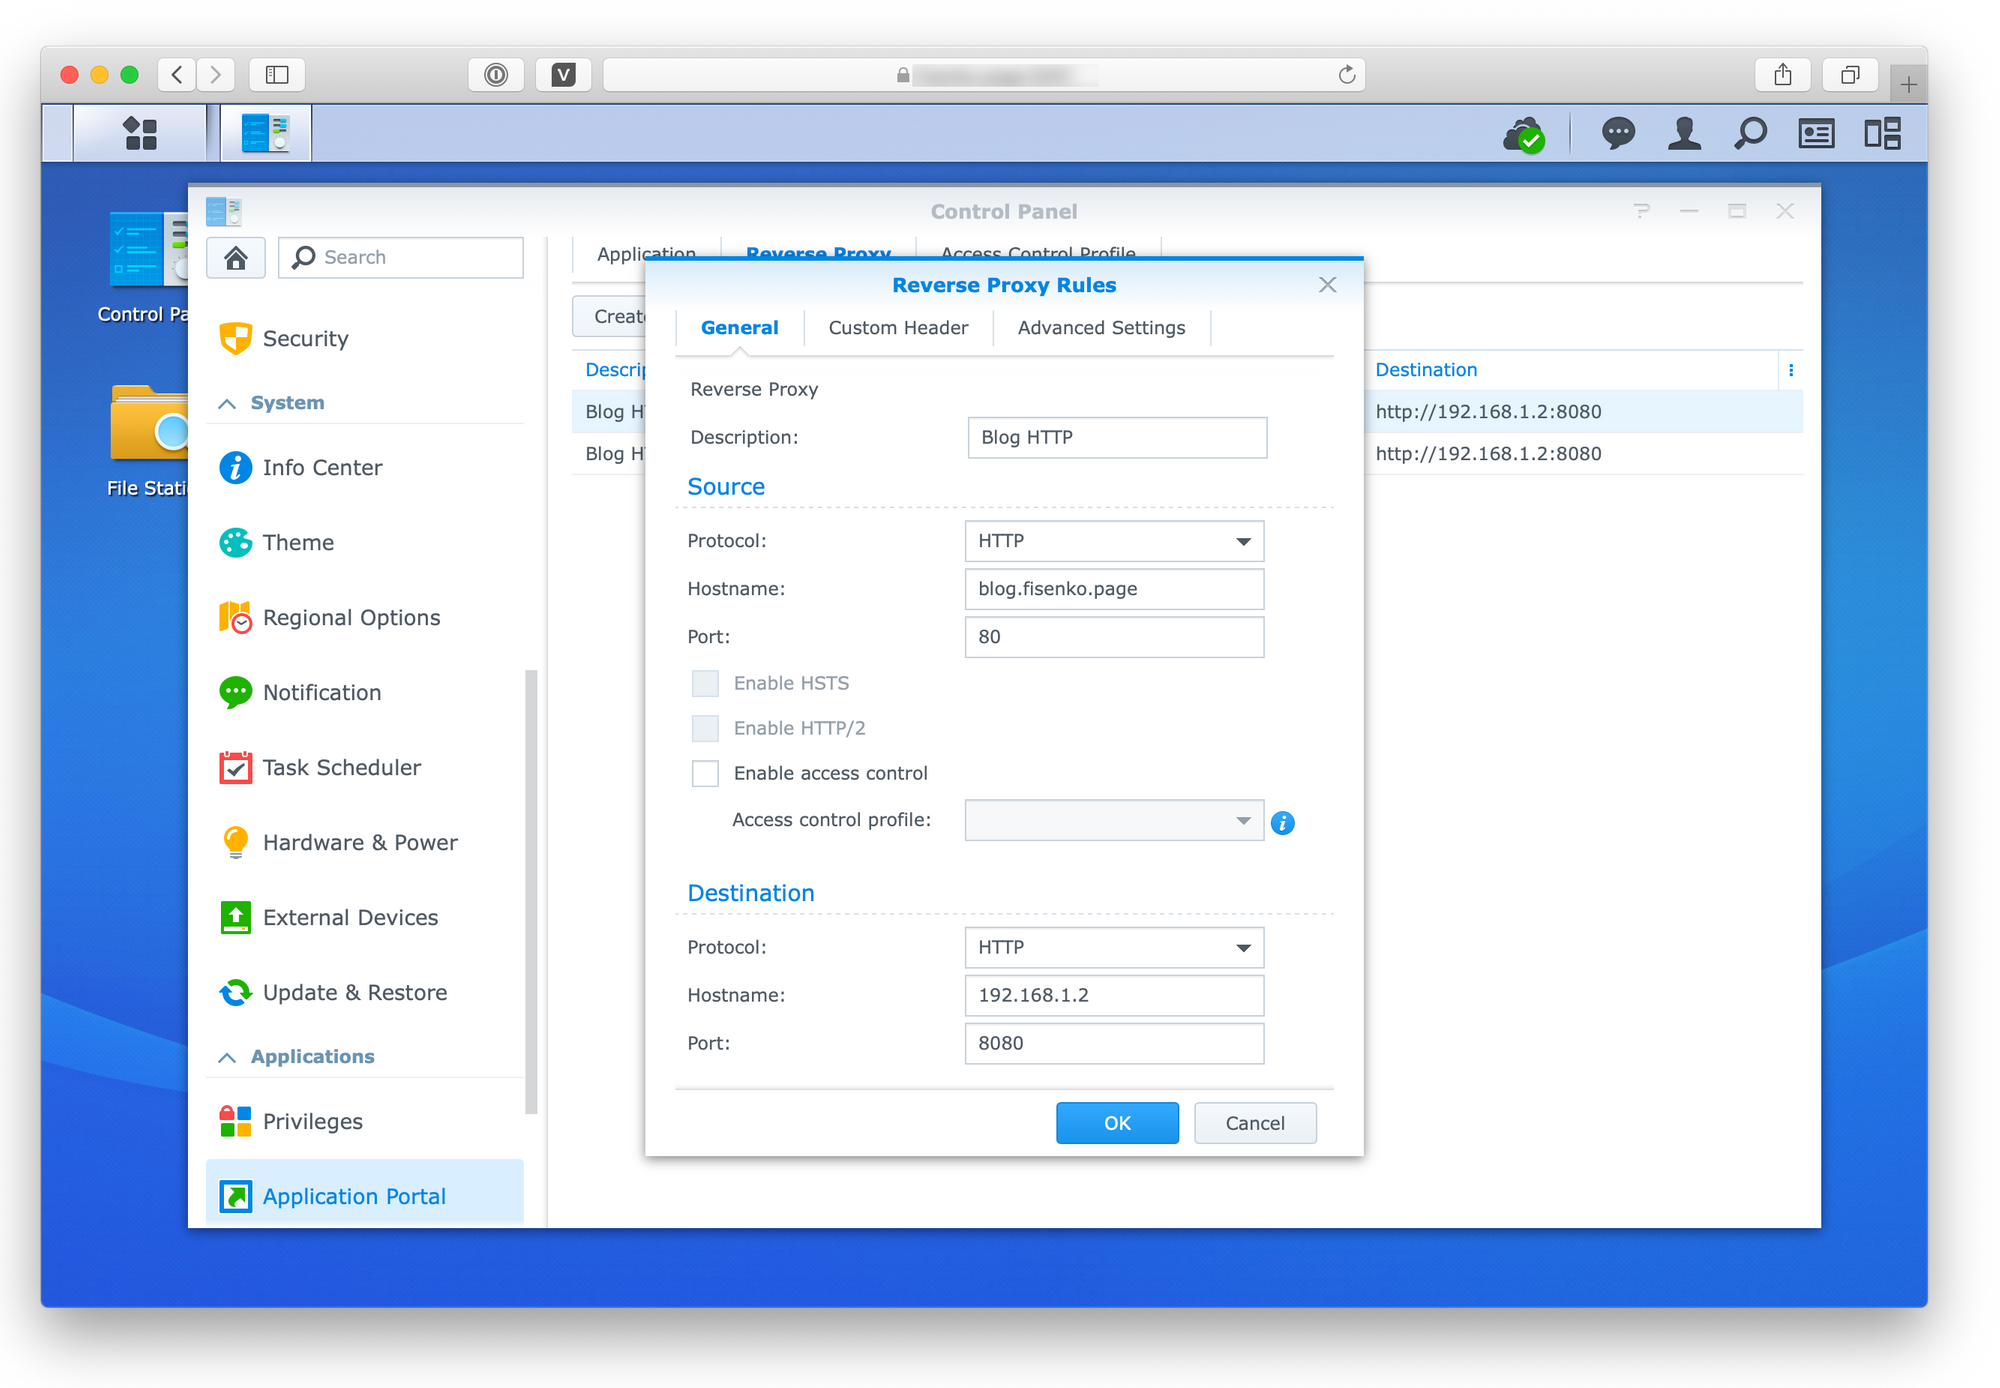 HTTP Configuration
 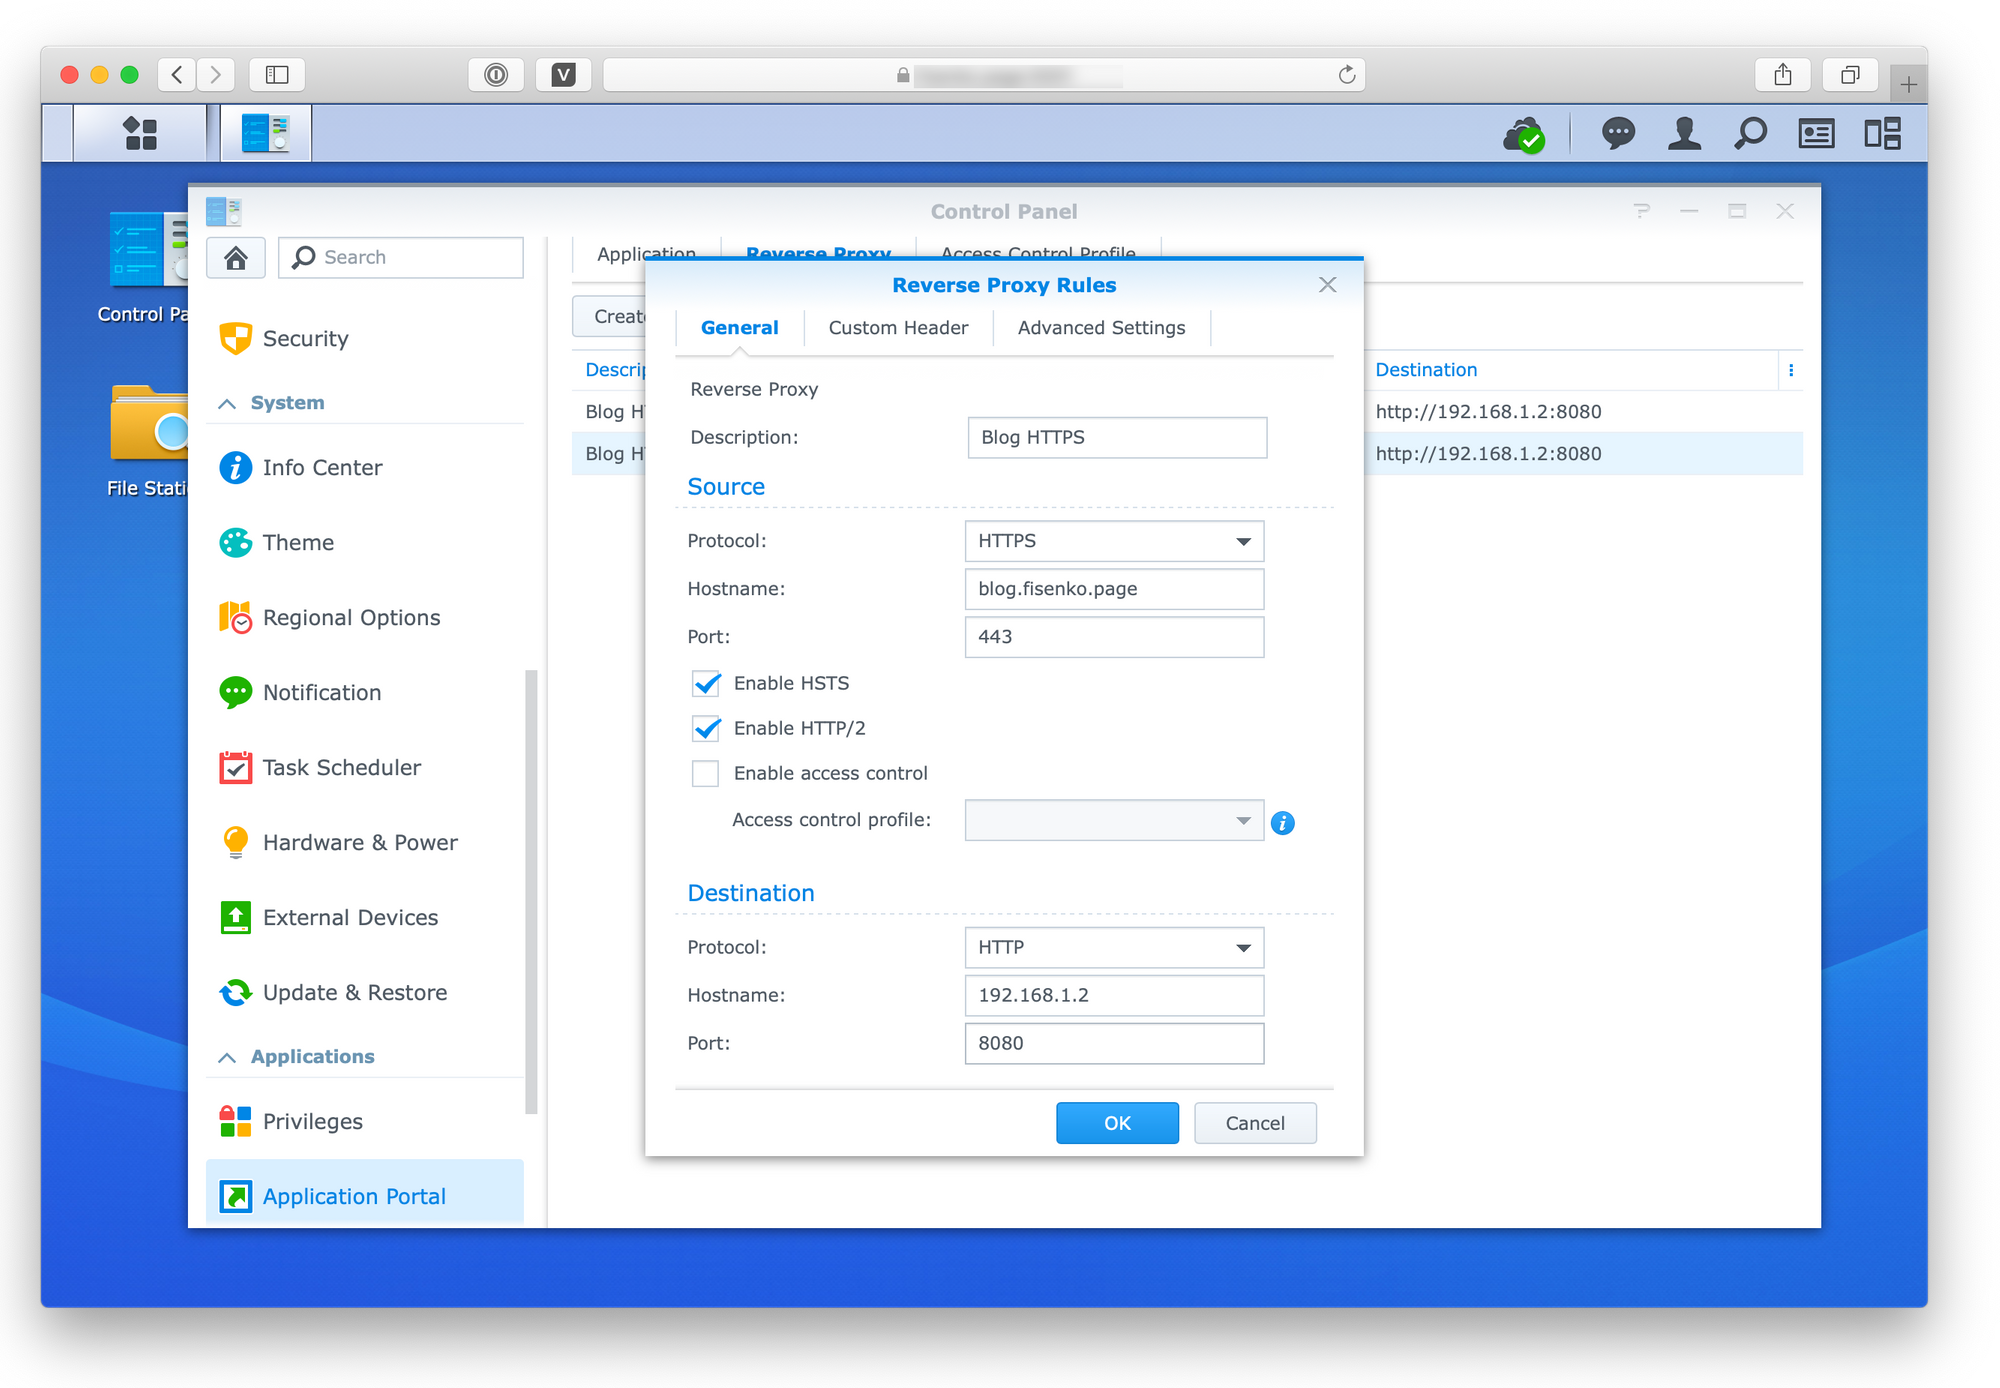 HTTP Configuration
After these manipulations, the blog will be accessible from the Internet.
Hopefully, you will find these instructions useful. Thank you! 🙏
Updates
09/07/2020: *.fisenko.page domains on all screenshots could be interpreted as *.fisenko.net domains due to migration to the .net domain.