Configuring Synology NAS to use its own domain name. Part 1
In this post, I describe how you could configure Synology NAS to use your own domain even if you don’t have static IP.
Synology NAS provides a build-in functionality to configure your domain like fisenko.net even you don’t have a static IP address. You just need to open: Control Panel, External Access, and click on Add in DDNS section.
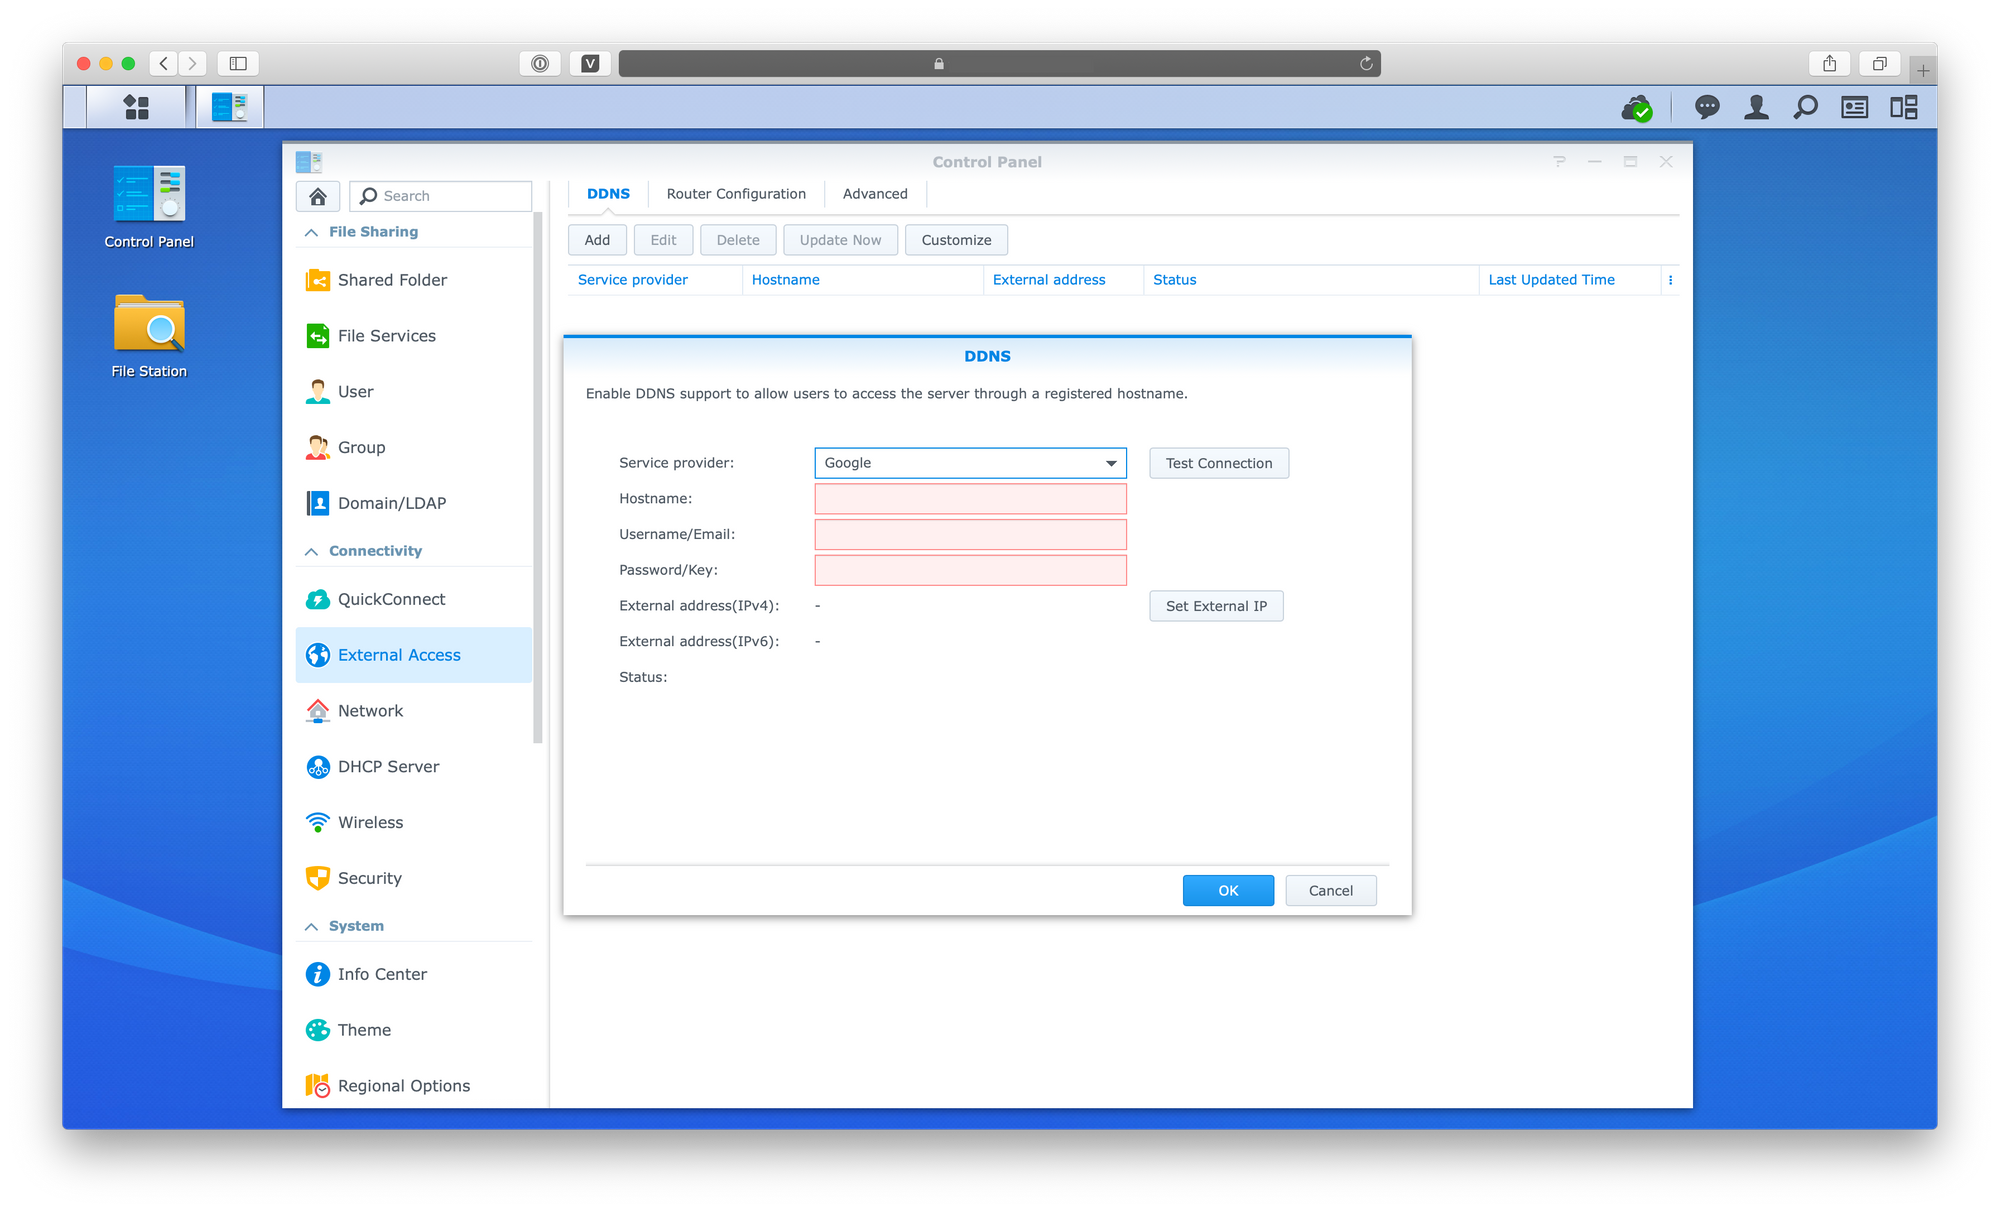
It works fine until you need to add sub-domains, like blog.fisenko.net, blahblahblah.fisenko.page etc. For some reason, the build-in DDNS settings don’t allow to add more than one domain for one service provider. For example, I want to configure fisenko.net, blog.fisenko.net with Google service provide.
Fortunately, there is awesome package DDNS Updater 2
DDNS Updater 2 is a web interface and client to configure and automatically update dynamic DNS hostnames. A variety of providers can be created ‘Out of the Box’ by the customizable user dialogues, configurable response codes, and protocols. If a protocol still can not set up API compliant, this can be achieved through an additional module. The setup wizard is another new tool with multiple features. These range from the first analysis via functional tests of compatibility with a module up to the completion of a new provider or protocol. New providers or protocols, if the compatibility is provided with a built-in module, can be distributed by import/export function easily via the Community.
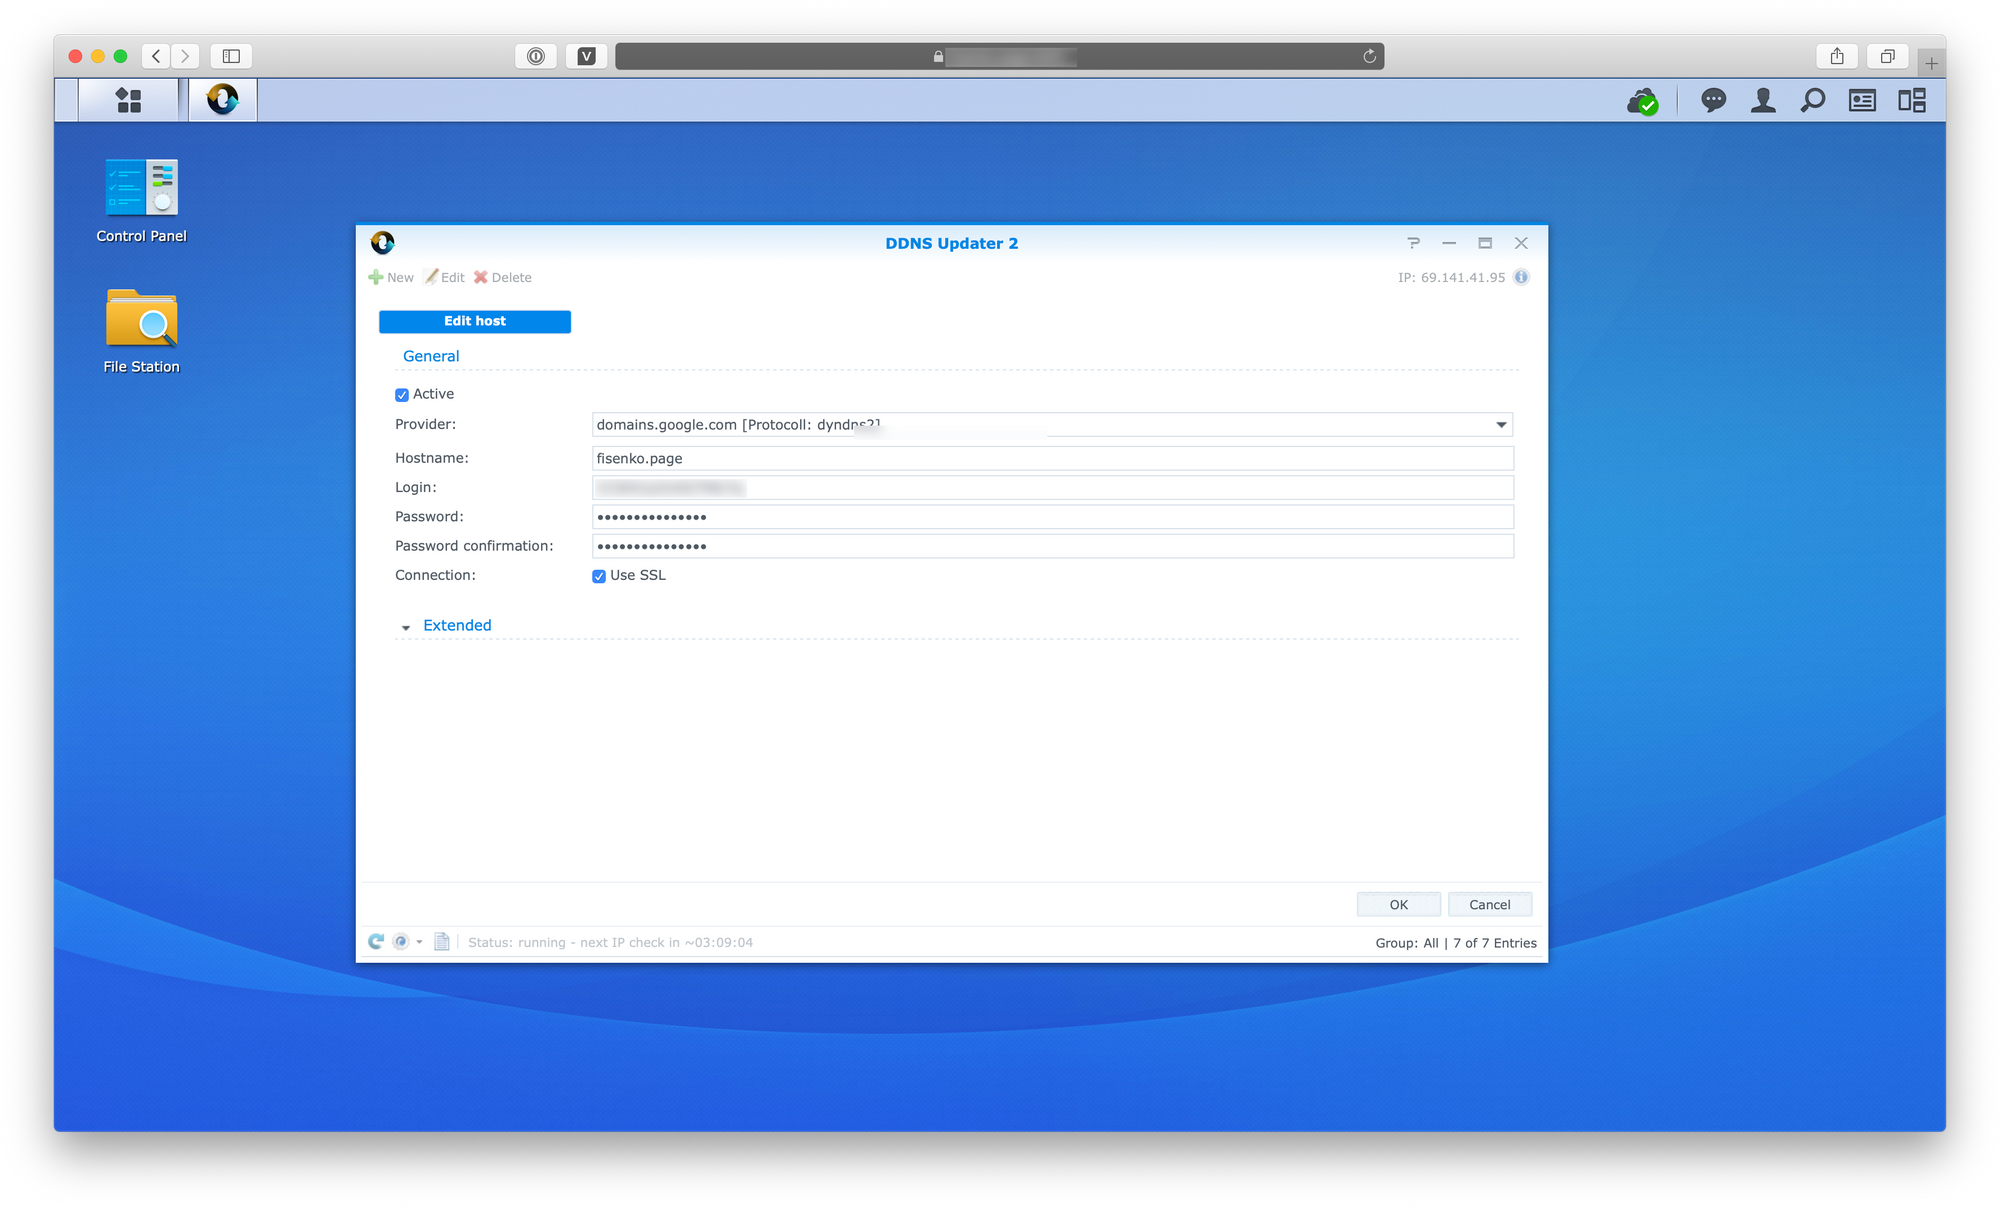
To get it worked DDNS Updater 2 needs to be downloaded and installed after that multiple sub-domains could be configured as below
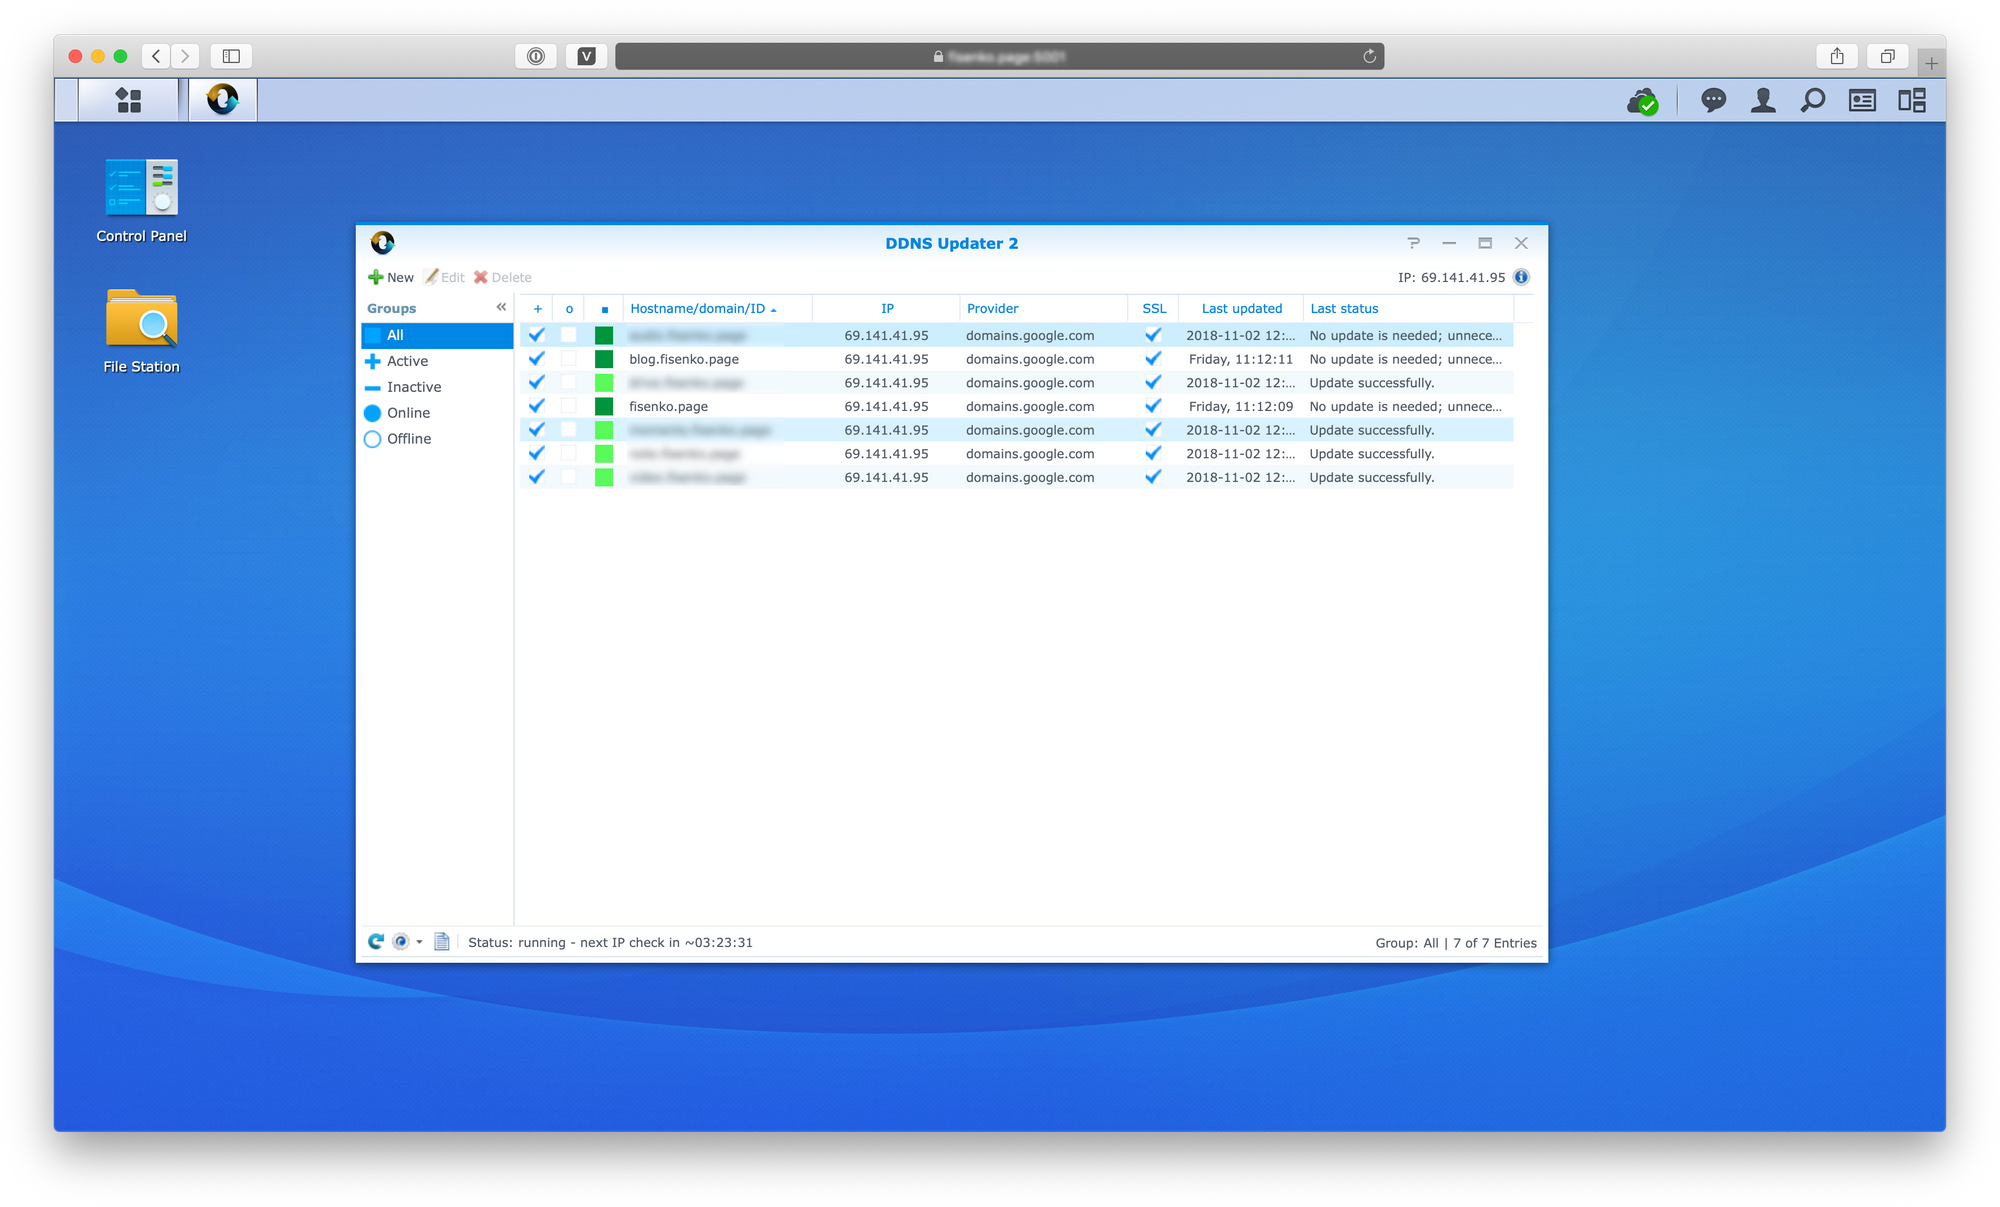 DDNS Updater 2
 DDNS Updater 2 domain configuration
The same configuration needs to be done for all subdomains.
In my case, I use Google Domains since it provides Dynamic DNS support out of the box. More details about Dynamic DNS could be found on the Google Domains Help.
Now DNS is configured but an additional step is required to add HTTPS support. Fortunately, Synology already has built-in Let’s Encrypt support. Certificates could be added as shown below:
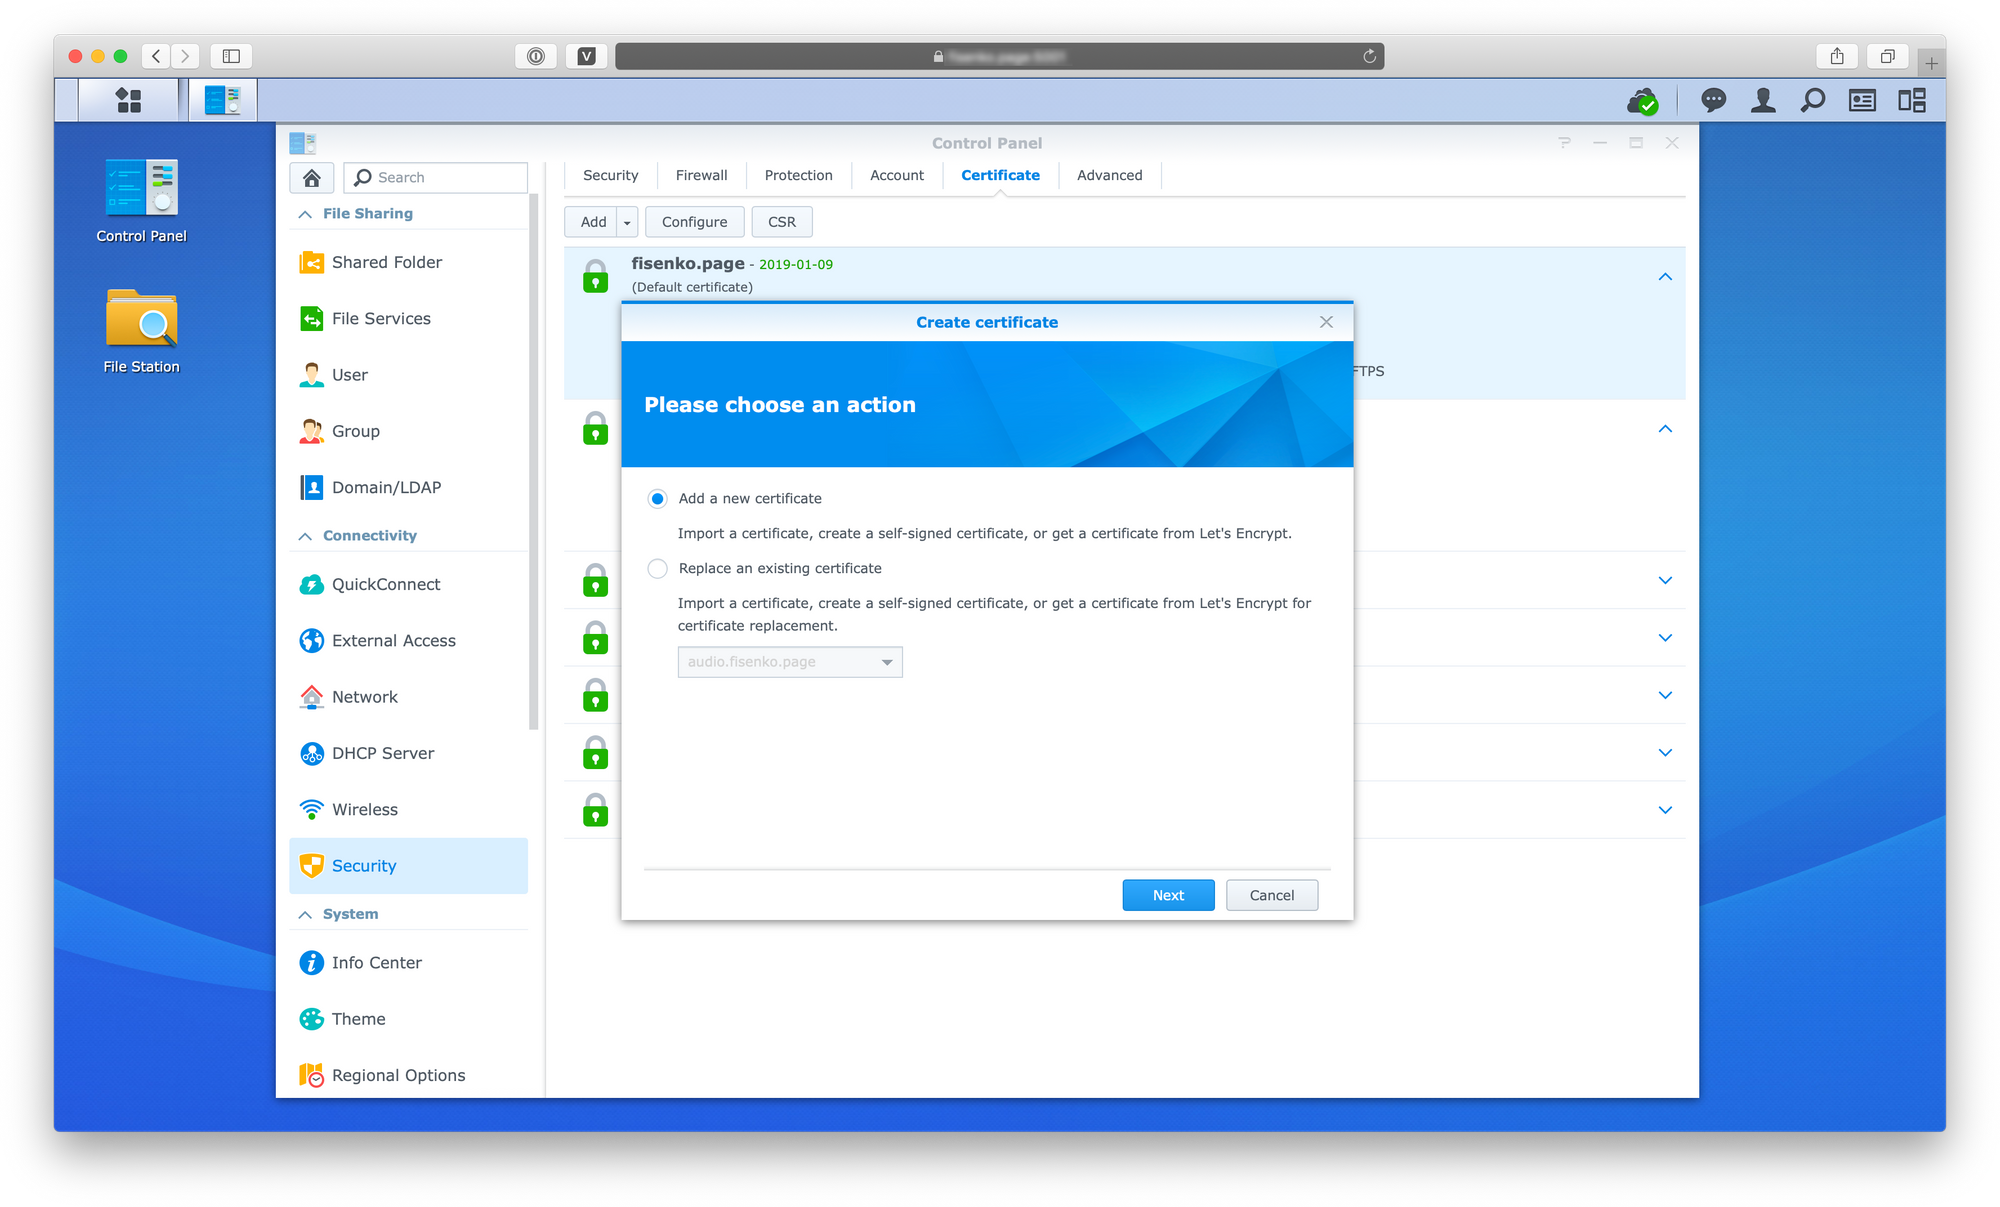
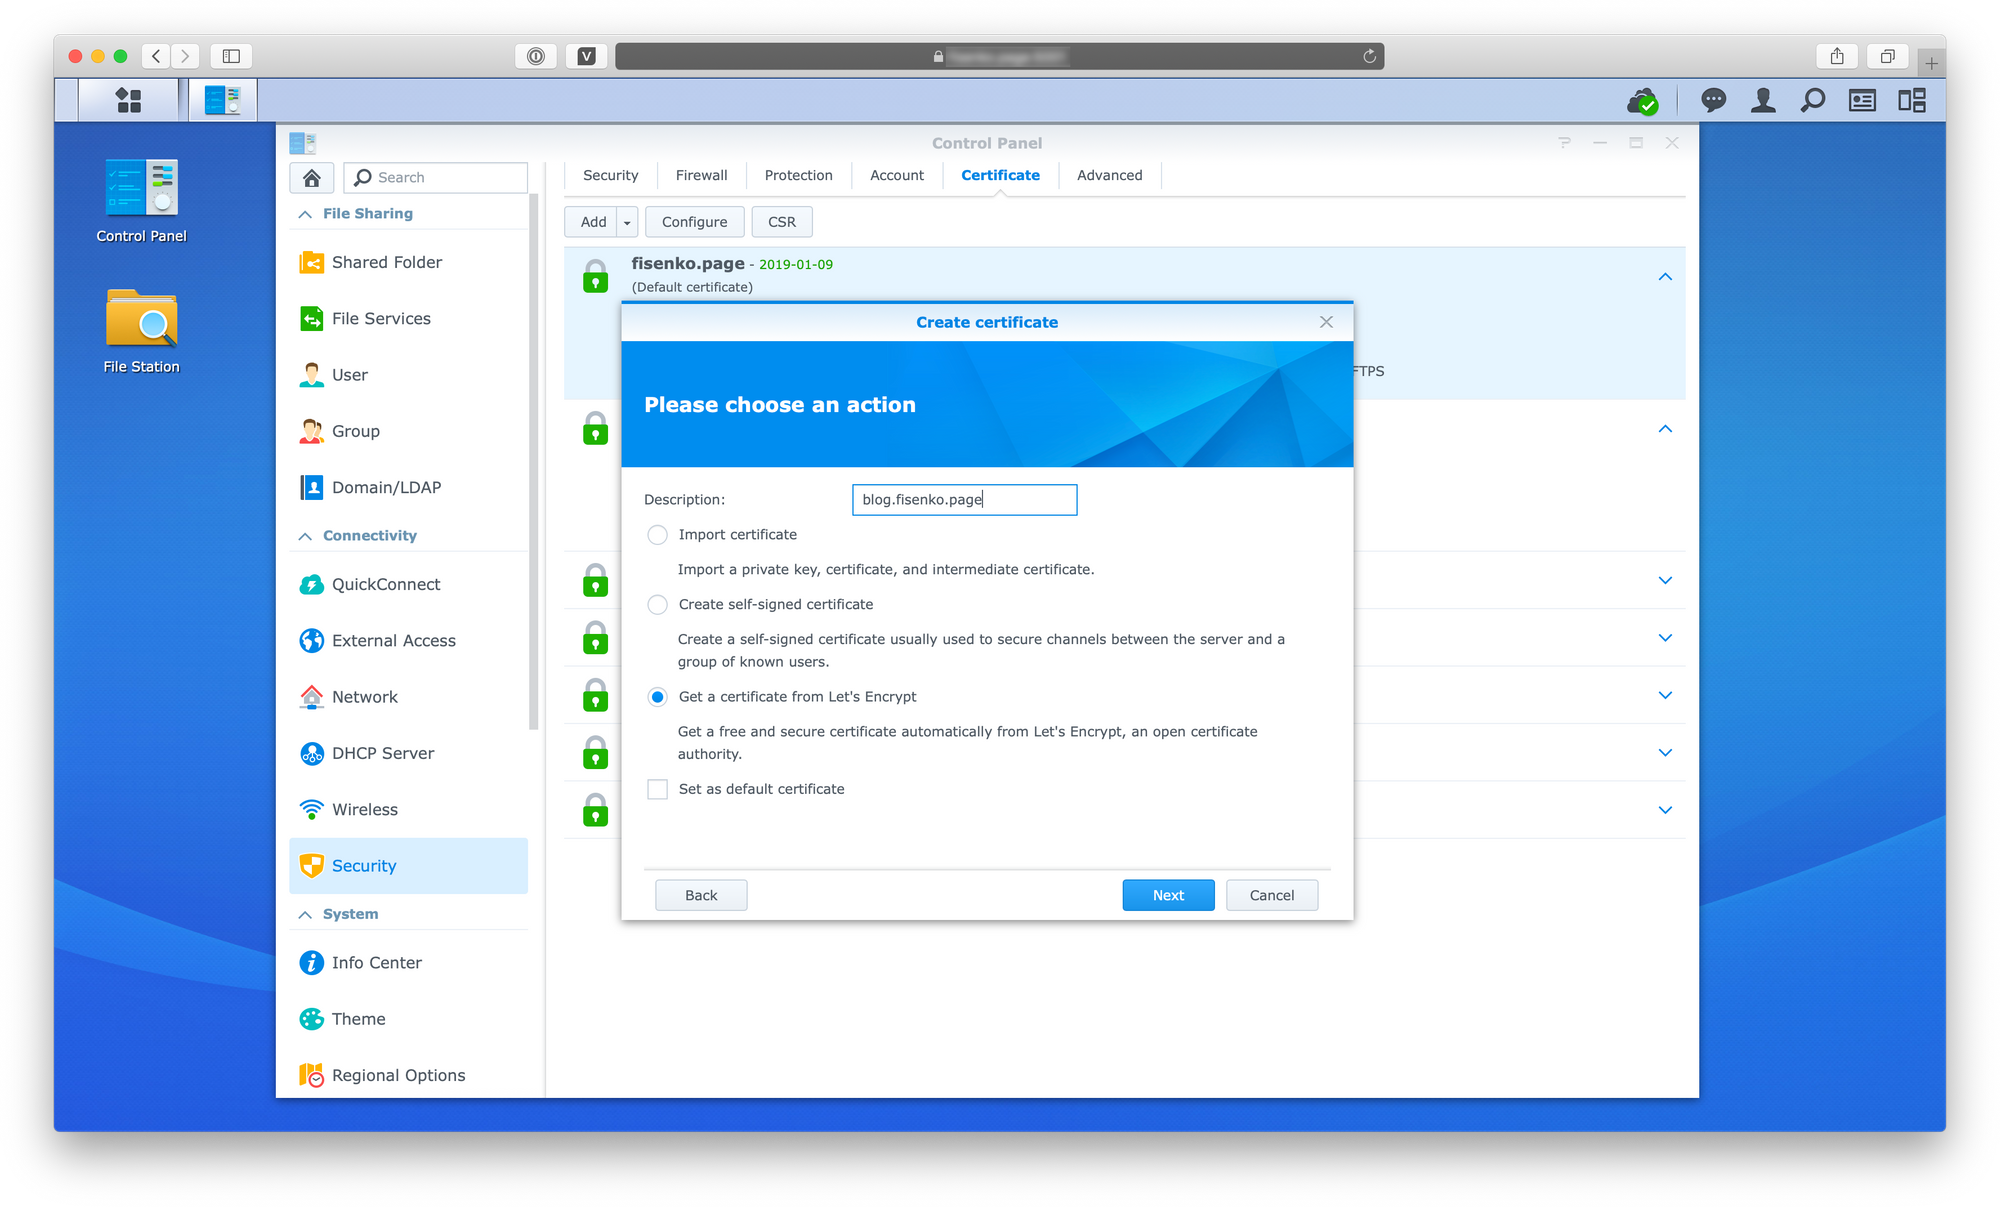
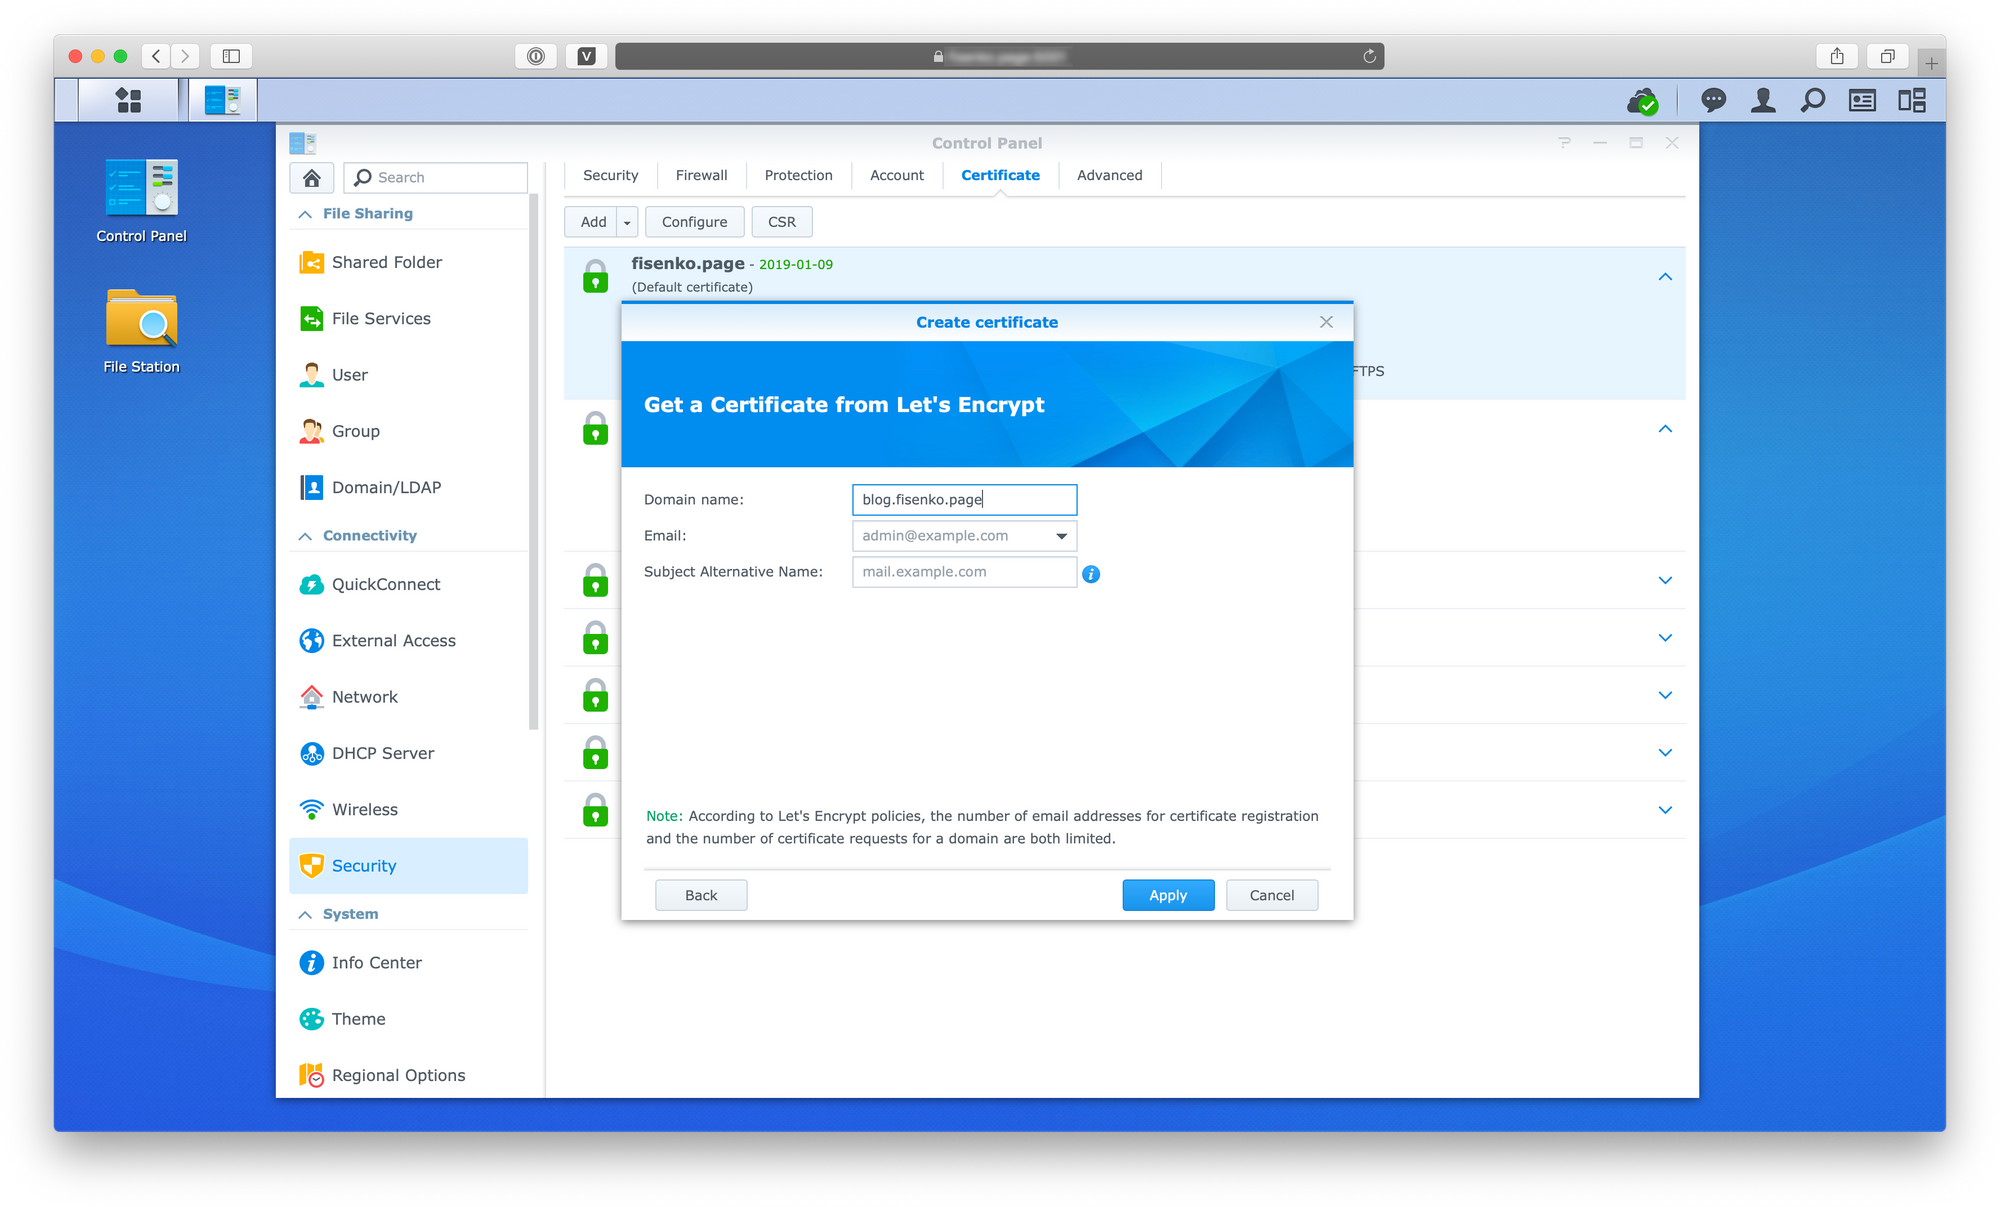
After these simple steps domains will be available over HTTPS with a valid certificate, e.g. blog.fisenko.net and fisenko.net.
Update: read Configuring Synology NAS to use its own domain name. Part 2 to see how to simplify the configuration.
Thank you! 🙏🏻
Related Posts
- Configuring Synology NAS to use its own domain name. Part 2
- Configuring Synology NAS to use its own domain name. Part 3